Siding Replacement Permit Requirements: A Complete Homeowner’s Guide
Navigating the complex world of home renovation often leads homeowners into a labyrinth of paperwork and legal obligations. When planning an exterior remodel, understanding siding replacement permit requirements is the first step toward ensuring a successful and legally compliant project. While many view siding as a purely aesthetic upgrade, building departments frequently categorize it as a significant structural modification that affects the building envelope and fire safety standards.
Most jurisdictions maintain strict oversight of exterior cladding to ensure that modern building codes are consistently met. These regulations are not merely bureaucratic hurdles; they are designed to protect the homeowner’s investment and the safety of the community. Failure to recognize the necessity of these permits can lead to substantial financial penalties and complications during future property transactions.
Furthermore, the specific rules governing siding projects can vary wildly between neighboring municipalities. A homeowner in a rural township might face fewer restrictions than one residing in a densely populated urban center. This disparity highlights the importance of conducting thorough local research before any demolition begins or materials are purchased.

In addition to safety, permits serve as a formal record of property improvement. They provide a documented trail that proves the work was performed to code and inspected by a qualified official. For those pursuing high-quality vinyl siding or other advanced materials, this documentation is often a prerequisite for maintaining manufacturer warranties and securing comprehensive homeowner insurance coverage.
The Fundamental Purpose of Residential Building Permits
Building permits act as a regulatory safeguard, ensuring that all construction activities adhere to the minimum standards for safety, health, and welfare. When it comes to the exterior of a home, the building official’s primary concern is the integrity of the building envelope. This envelope protects the interior from moisture, wind, and temperature fluctuations, all of which are critical for the longevity of the structure.
Historically, building codes have evolved in response to localized disasters, such as fires or severe storms. These codes dictate how materials must be fastened, how they should react to heat, and how they contribute to the overall structural stability of the house. Without a permit process, there would be no objective way to verify that a contractor has followed these life-safety protocols.
Moreover, the permit process facilitates a formal review of the materials being used. For instance, in areas prone to wildfires, specific fire-resistance ratings for siding are mandatory. The permit application allows the building department to verify that the proposed vinyl or composite material meets the fire spread indices required for that specific geographic zone.
Finally, permits establish a legal framework for accountability. By pulling a permit, the homeowner or contractor acknowledges their responsibility to meet local standards. It ensures that a neutral third party—the building inspector—validates the work, providing an extra layer of protection against subpar craftsmanship or corner-cutting by labor crews.
Distinguishing Between Cosmetic Repairs and Structural Replacement
One of the most common points of confusion for homeowners is the distinction between a minor repair and a full replacement. Generally, replacing a few damaged boards or a small section of vinyl siding is considered maintenance. Most building departments do not require a permit for these minor cosmetic fixes, as they do not significantly alter the building’s protective shell.
However, when the scope of work involves stripping the entire house and installing new cladding, it crosses the threshold into a regulated activity. This is because a full replacement typically involves inspecting and potentially replacing the weather-resistive barrier (WRB) underneath. The WRB is the home’s primary defense against water intrusion, and its proper installation is vital for preventing mold and rot.
In many cities, the “25 percent rule” applies. This means that if you are replacing more than 25 percent of a single wall or the entire exterior, you must comply with siding replacement permit requirements. This threshold ensures that large-scale changes are monitored while allowing homeowners the freedom to perform routine upkeep without government intervention.
It is also important to note that the type of material can trigger permit needs. Switching from wood to vinyl, or from vinyl to fiber cement, changes the weight and fire profile of the exterior. These changes require a professional review to ensure the existing wall framing can support the new load and that fire separation distances between houses remain compliant.
Siding Replacement Permit Requirements
When diving into the specifics of siding replacement permit requirements, one must look at both the technical and administrative aspects of the law. Local building codes are often based on the International Residential Code (IRC), but they are frequently modified to address regional climate challenges. For example, coastal areas have rigorous requirements for wind-load resistance and fastener spacing.
The permit application typically requires a detailed project description, including the manufacturer’s specifications for the chosen siding material. Officials will look for “Product Approval” numbers, which indicate that the material has been tested for impact resistance and fire safety. If the siding is vinyl, the thickness and the method of attachment become critical data points for the reviewer.
Another key requirement involves the integration of flashing and house wrap. Modern codes are very specific about how windows, doors, and penetrations are sealed. The permit process ensures that these details are not overlooked. Improper flashing is the leading cause of structural rot in residential buildings, making this a high-priority area for local inspectors.
Furthermore, some municipalities require a site plan or a survey if the siding change involves adding thickness that might encroach on property setbacks. While this is rare for standard siding, it can become an issue with exterior insulation finishing systems (EIFS) or thick masonry veneers. Understanding these nuances is essential before signing a contract with an installation firm.
The Role of the International Residential Code (IRC)
The International Residential Code (IRC) serves as the backbone for most local building laws in the United States. This document provides standardized guidelines for every aspect of home construction, including the installation of exterior wall coverings. Chapter 7 of the IRC specifically addresses wall coverings and outlines the necessary steps for a code-compliant installation.
According to the IRC, siding must be installed in a manner that provides a continuous water-resistive barrier behind the exterior veneer. This requirement is a cornerstone of permit inspections. The code also specifies the type of fasteners required—usually corrosion-resistant nails—and the depth to which they must penetrate the wall studs.
Local jurisdictions adopt the IRC but often add their own “local amendments.” These amendments might increase the requirements for insulation or mandate specific colors in historic districts. Therefore, while the IRC provides a general roadmap, the local building official remains the final authority on what is allowed and what requires a formal permit.
By following the IRC, building departments ensure that homes are resilient against the elements. For vinyl siding specifically, the code dictates the “j-channel” and “starter strip” configurations to prevent wind uplift. A permit ensures that these technical standards are translated from the code book to the actual walls of your home.
Municipal Variations and Local Zoning Laws
Geography plays a massive role in the complexity of siding replacement permit requirements. In the Northeast, where ice damming and heavy snow are prevalent, codes focus heavily on moisture management and thermal breaks. Conversely, in the Southwest, the emphasis might shift toward fire resistance and UV protection for the materials used.
Large metropolitan areas like Chicago or New York City have their own specialized building codes that are often more stringent than the national standards. In these cities, the density of the housing means that fire spread is a major concern. If you are replacing siding on a rowhouse, the permit requirements might include fire-rated sheathing and specific gaps between neighboring structures.
In addition to building codes, zoning laws also influence the permit process. Zoning departments are concerned with the “character” of a neighborhood and the physical placement of structures. If a siding replacement involves adding thick rigid foam insulation to the exterior, it could technically move the wall closer to the property line, potentially violating setback requirements.
Homeowners should also be aware of “Design Review Boards” in certain upscale or planned communities. These boards work alongside the building department but focus on the aesthetic impact of the siding. Even if the building department issues a safety permit, the zoning or design board might reject the color or texture if it doesn’t align with the community’s master plan.
Historic District Regulations and Preservation Permits
Replacing siding on a home located in a designated historic district is significantly more challenging than in a standard residential area. Historic commissions prioritize the preservation of original materials and architectural integrity. In these cases, the siding replacement permit requirements often involve a “Certificate of Appropriateness.”
If you own a Victorian or Craftsman home, you may be forbidden from using vinyl siding entirely. These boards often mandate the use of wood or high-end wood-look composites that match the original profile of the house. The permit process in a historic district is much slower, as it often involves public hearings and detailed architectural drawings.
However, these strict rules serve to maintain the property value and historical significance of the neighborhood. While it may be more expensive and time-consuming, complying with these preservation permits ensures that the unique character of the home remains intact for future generations. It also prevents legal action from preservation societies who have the power to halt construction.
When dealing with historic homes, the building inspector will also look for lead paint issues. Any siding replacement project on a house built before 1978 must comply with the EPA’s Renovation, Repair, and Painting (RRP) Rule. This adds another layer of permit-related compliance regarding the safe handling and disposal of hazardous materials.
Technical Standards for Vinyl Siding Installation
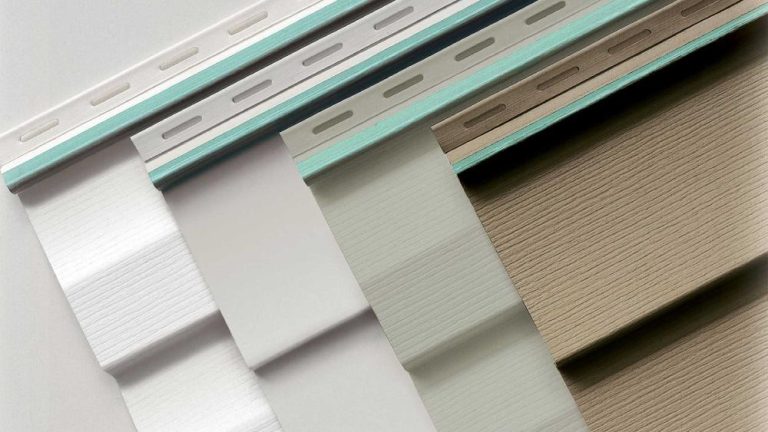
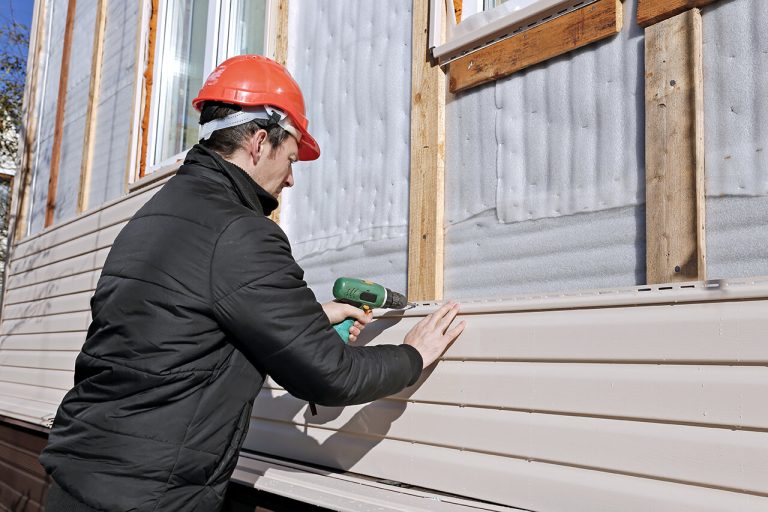
Vinyl siding remains one of the most popular choices for homeowners due to its durability and low maintenance. However, its unique physical properties—specifically its tendency to expand and contract with temperature changes—make its installation a technical challenge. Building codes have very specific rules for how vinyl must be hung to avoid warping or buckling.
Standard permit requirements for vinyl siding include the use of specific nail types. Nails must be driven straight and level into the center of the nailing slots. Perhaps most importantly, the nails must not be driven tight against the siding. A small gap, roughly the thickness of a dime, must be left between the nail head and the siding to allow the panels to slide as they heat up and cool down.
The “overlap” of vinyl panels is another area of concern for inspectors. To prevent water from driving behind the panels, they must overlap by a specific distance, usually around one inch. If the panels are cut too short or overlapped incorrectly, the building’s moisture defense is compromised, leading to potential failure during a rainstorm.
Furthermore, the corner posts and trim pieces must be installed in a specific sequence to ensure proper shedding of water. Inspectors will check the “flashing” around windows to see if it is integrated with the siding’s j-channels. This level of technical scrutiny is why many homeowners choose to hire licensed professionals who are familiar with these rigorous standards.
| Requirement Category | Standard Specification | Inspection Focus |
|---|---|---|
| Fastener Type | Corrosion-resistant (Galvanized steel/Aluminum) | Nail depth and placement in slots |
| Weather Barrier | ASTM E1677 Grade D or equivalent | Lapping of seams and tape integrity |
| Expansion Gap | 1/4 to 3/8 inch at all openings | Freedom of movement for temperature shifts |
| Wind Load | Varies by zone (e.g., 110 mph – 150 mph) | Nail spacing and panel interlocking |
The Financial Impact of Permit Fees and Fines
Obtaining a permit is not free, and the associated costs can vary based on the project’s total value or the square footage of the home. Some municipalities charge a flat fee, while others use a percentage-based calculation. While these fees might seem like an unnecessary expense, they are a fraction of the cost of the potential fines for non-compliance.
Working without a permit is a risky gamble. If a neighbor reports the work or a building official happens to drive by, a “Stop Work Order” will be issued immediately. This halts the project in its tracks, often leaving the home’s interior exposed to the elements while the legalities are sorted out. In many cases, the permit fee is doubled or tripled as a penalty for starting without authorization.
Beyond immediate fines, there are long-term financial consequences. If you attempt to sell your home, the buyer’s home inspector or the title company will often check the municipal records for permits. If they find that the siding was replaced illegally, the sale can be derailed. You may be forced to obtain a “retroactive permit,” which could involve tearing off parts of the new siding so an inspector can see the work underneath.
Insurance companies also keep a close eye on permit records. If your home suffers damage from a storm and the siding was installed without a permit, the insurer may have grounds to deny the claim. They can argue that because the work was not inspected for code compliance, the failure was due to improper installation rather than an “act of God.”
Calculating the Cost of Compliance
When budgeting for your project, it is wise to set aside 1% to 3% of the total estimate for permit and inspection fees. This small investment buys peace of mind and ensures that the project moves forward without legal interruptions. Most contractors will handle the permit application for you, but they will pass the cost on in their final invoice.
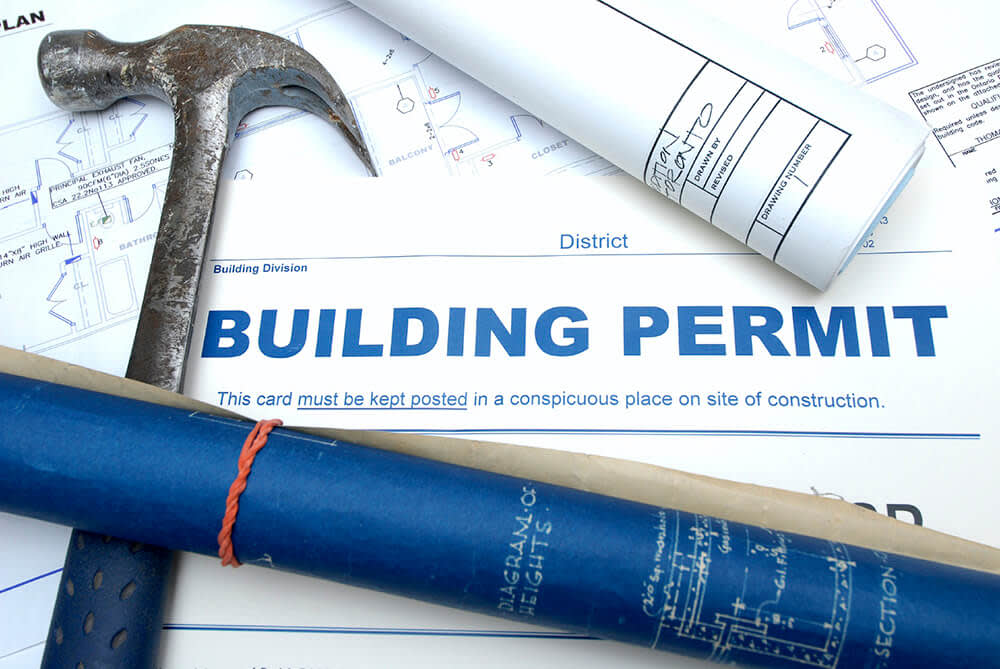
It is important to ask for a copy of the permit once it is issued. It should be posted in a visible location, typically a front window, for the duration of the project. This serves as a signal to the community and the authorities that you are a responsible homeowner who respects local laws and safety standards.
In addition to the permit fee itself, you might need to pay for professional services such as an architect or engineer if the project is complex. While this isn’t usually necessary for standard vinyl siding, it might be required if you are significantly changing the exterior structure or adding heavy masonry elements. These costs should be factored into the initial feasibility study of the remodel.
Ultimately, the cost of compliance is an investment in the home’s equity. A house with a clean permit history is much easier to sell and often commands a higher price because the buyer has documented proof of the home’s quality. It eliminates the “fear factor” that often accompanies unpermitted renovations.
The Step-by-Step Permit Application Process
The journey to securing a permit begins at the local building department. Today, many municipalities offer online portals where you can download the necessary forms and even upload your plans. The process typically starts with a “Permit Application,” which asks for detailed information about the property owner, the contractor, and the scope of work.
Once the application is submitted, it enters the “Plan Review” phase. During this time, a code official examines your proposal to ensure it meets all structural and safety requirements. They will check the manufacturer’s data sheets for the siding, the type of house wrap being used, and the proposed method of attachment. This phase can take anywhere from a few days to several weeks, depending on the department’s workload.
After the plan is approved, the permit is issued, and the work can begin. However, the process doesn’t end there. Most siding projects require at least two inspections. The first is a “mid-point” or “sheathing” inspection, where the official checks the water-resistive barrier and flashing before it is covered by the siding. This is the most critical inspection because it catches potential leaks before they are hidden from view.
The final step is the “Final Inspection.” Once the siding is fully installed and the site is cleaned, the inspector returns to ensure the panels are properly hung and that all trim and soffit work is complete. If everything passes, the permit is “closed,” and a certificate of completion is issued. Keeping this certificate in your permanent home records is highly recommended.
Required Documentation for a Siding Permit
To avoid delays, you must provide a complete package of documentation. This usually includes a site plan showing the footprint of the house and its proximity to property lines. You will also need a “Scope of Work” document that outlines exactly what is being removed and what is being installed. Be prepared to provide the specific brand and model of the siding you intend to use.
Contractor information is another mandatory requirement. Most cities will not issue a permit unless the contractor is licensed and insured within that jurisdiction. You will likely need to provide their license number and a certificate of insurance showing general liability and workers’ compensation coverage. This protects you from being held liable if a worker is injured on your property.
If you are performing the work as a “Homeowner-Builder,” you may need to sign an affidavit acknowledging that you are taking on the legal responsibilities of a contractor. This includes ensuring all work meets code and that you are personally responsible for any safety violations. Some jurisdictions have restrictions on homeowner-builders, especially for multi-family dwellings.
Lastly, if your home is in a flood zone or a high-wind area, you may need to provide an “Elevation Certificate” or an engineering report. These documents prove that the new siding and its attachment method are sufficient to withstand the specific environmental pressures of your location. Gathering these documents in advance can significantly speed up the approval process.
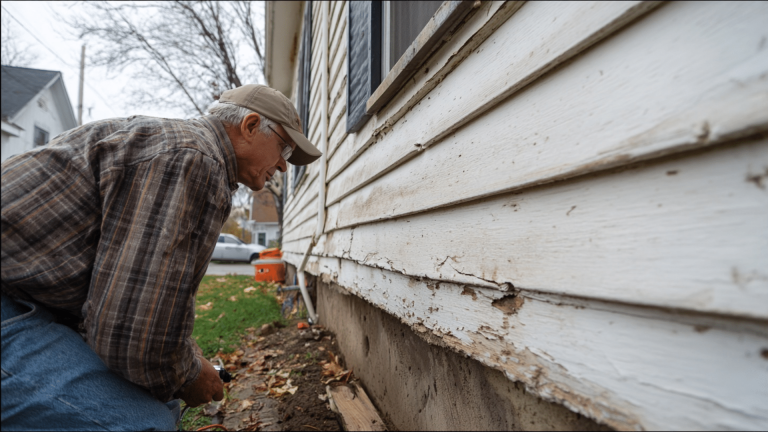
Common Challenges and How to Overcome Them
One of the biggest challenges in meeting siding replacement permit requirements is dealing with “non-conforming” existing structures. If your home was built decades ago, the original construction may not meet modern codes. When you pull a permit for new siding, the building official might require you to bring other parts of the exterior up to current standards.
For example, you might be required to install “kick-out flashing” where a roofline meets a wall, even if it wasn’t there before. While this can increase the cost of the project, it is ultimately for your benefit, as it prevents major water damage. Approaching these requirements with a mindset of “upgrading for safety” rather than “following a rule” can make the process less frustrating.
Another common hurdle is a disagreement between the contractor and the inspector. Inspectors have a fair amount of discretion in interpreting the code. If a dispute arises, it is best to remain professional and ask for the specific code section the inspector is referencing. A good contractor will have a respectful relationship with the building department and can usually resolve these issues through clear communication.
In addition, material shortages can sometimes complicate the permit process. If you receive approval for a specific type of vinyl siding but the manufacturer goes out of stock, you cannot simply switch to a different product without informing the building department. You may need to submit a “Revision” to your permit to ensure the new material also meets the required standards.
Managing Timeline Expectations
Homeowners often underestimate how long the permit process takes. It is not uncommon for the administrative phase to take longer than the actual physical installation of the siding. To manage this, you should start the permit process at least two months before your desired start date. This allows for any back-and-forth with the plan reviewers.
Weather is another factor that can disrupt the timeline. Since siding is an exterior project, rain or snow can delay inspections. Building inspectors generally will not inspect work if it is covered by tarps or if the site is unsafe due to ice. Building a “time buffer” into your project schedule will help you avoid the stress of missed deadlines.
Furthermore, remember that the “Final Inspection” is what legally closes the project. Do not make the final payment to your contractor until the permit has been officially signed off by the building department. This provides the ultimate leverage to ensure that any minor corrections requested by the inspector are actually completed in a timely manner.
By staying organized and keeping a log of all communications with the city, you can navigate these challenges effectively. A successful project is the result of careful planning, professional execution, and a commitment to following the legal requirements of your community.
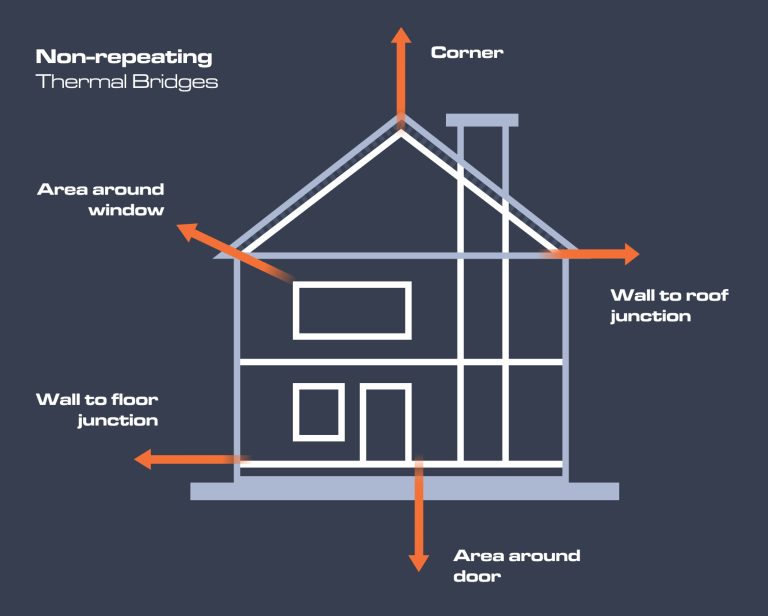
The Relationship Between Siding and Energy Codes
In recent years, building codes have placed a much heavier emphasis on energy efficiency. Many siding replacement permit requirements now include compliance with regional energy codes. This often involves the installation of “continuous insulation” (CI) behind the new siding. CI helps break the thermal bridge created by the wooden wall studs, significantly reducing heat loss.
When you replace your siding, you have a once-in-a-generation opportunity to improve your home’s R-value. Many jurisdictions now mandate a minimum R-value for exterior walls during a full reside. This might mean adding half an inch or an inch of rigid foam board before the vinyl panels are installed. The permit process ensures that this insulation is installed correctly, with taped seams to act as an additional air barrier.
However, adding insulation also changes the “vapor profile” of the wall. If done incorrectly, it can trap moisture inside the wall cavity, leading to rot. The building inspector will check to ensure that the combination of insulation and house wrap allows the wall to “breathe” while still providing thermal protection. This technical balance is why the permit review is so critical for the health of your home.
Moreover, some states offer tax credits or rebates for siding projects that exceed the minimum energy code requirements. To claim these incentives, you will almost certainly need a closed permit and an inspection report as proof that the energy-saving measures were actually implemented. In this way, the permit process can actually help put money back into your pocket over the long term.
Ventilation Requirements and Attics
Siding replacement often affects the ventilation of the entire house, particularly at the soffits and eaves. Proper attic ventilation is essential for preventing ice dams in the winter and reducing cooling costs in the summer. When you apply for a siding permit, the department may look at your proposed soffit installation to ensure it provides enough “net free vent area.”
If you switch from an open-rafter design to a closed-soffit design with vinyl or aluminum, you must ensure that air can still flow into the attic space. Using perforated soffit panels is the standard solution, but the amount of perforation required depends on the square footage of your attic. An inspector will verify that you aren’t accidentally “suffocating” your house by sealing up these vital intake vents.
Additionally, the permit might cover the installation of new gable vents or ridge vents if they are being replaced along with the siding. Ensuring that the entire ventilation system works in harmony is a key part of the code compliance process. It prevents moisture buildup in the attic, which can destroy shingles from the inside out and lead to mold growth on the underside of the roof deck.
Finally, the interface between the siding and the roofline—the fascia—is a high-risk area for water intrusion. The permit ensures that the “drip edge” from the roof is correctly integrated with the new fascia wrap. This small detail is often overlooked by DIYers but is a major focus for professional inspectors who want to ensure the home remains dry for decades.
Safety Protocols and Debris Management
A siding project is a major construction event that generates a significant amount of waste. Permit requirements often extend to how this waste is handled. Many cities require a “Waste Management Plan” as part of the permit application, outlining how much material will be recycled versus how much will go to a landfill.
Lead-based paint is the primary safety concern during the removal of old wood siding. If your home was built before 1978, the contractor must follow lead-safe work practices. This includes containing the work area with plastic sheeting, preventing dust from spreading to neighboring properties, and using specialized HEPA vacuums for cleanup. The building inspector may ask to see proof of the contractor’s lead-safe certification.
Scaffolding and ladder safety are also within the purview of the permit process. While building inspectors focus on the structure, OSHA (Occupational Safety and Health Administration) regulates the safety of the workers. However, a building official can report unsafe work conditions to OSHA if they see workers at risk during a routine inspection. A permit signifies that the job site is a “legal” construction zone, subject to safety oversight.
Furthermore, the permit ensures that the siding removal doesn’t interfere with utility lines. Electrical masts and gas meters often need to be temporarily detached or worked around during a reside. The permit process involves notifying the utility companies or ensuring that the contractor is qualified to work near these hazards. This prevents accidental power outages or dangerous gas leaks during the renovation.
Protecting Neighboring Properties
Siding replacement is a messy and loud process. Most permits include “hours of operation” clauses, restricting noisy work to daytime hours (usually 7:00 AM to 6:00 PM). These rules are designed to protect the “quiet enjoyment” of the neighborhood. Violating these hours can result in fines and friction with your neighbors.
In addition, the permit requires that debris be contained on your own property. If old vinyl or wood chips blow into a neighbor’s yard, you could be held liable for damages. A permit often requires the use of a “roll-off” dumpster, and there are specific rules about where these can be placed. If the dumpster needs to sit on a public street, you will likely need an additional “Encroachment Permit” or “Street Use Permit.”
Dust control is another factor, especially if the old siding is being sanded or if fiber cement siding is being cut. Fiber cement contains silica, which is hazardous if inhaled. Modern permit standards require “wet cutting” or vacuum-attachment saws to minimize airborne particles. These measures protect not only the workers but also your family and the people living nearby.
By following these protocols, you ensure that your home improvement project doesn’t become a community nuisance. A well-managed job site, backed by the proper permits, reflects well on the homeowner and ensures that the project concludes with positive relationships all around the neighborhood.
Impact on Insurance and Home Appraisal
The long-term value of your home is deeply tied to its permit history. When an appraiser evaluates a property, they look for high-quality, code-compliant improvements. A professional siding job, backed by a closed permit, is a tangible asset that can increase the resale value of the home by thousands of dollars.
Conversely, unpermitted work is often viewed as a liability. If an appraiser notices brand-new siding but finds no corresponding permit in the public record, they may flag the property. This can complicate the financing process for a potential buyer, as many mortgage lenders are hesitant to provide loans for properties with “clouded” titles or potential code violations.
From an insurance perspective, siding replacement permit requirements are non-negotiable. Your insurance policy is a contract based on the assumption that your home is built to code. If you modify the house without a permit and a claim later arises—such as a fire or wind damage—the insurance company can investigate the cause. If the installation was faulty and unpermitted, they may refuse to pay for the repairs.
Moreover, some insurance companies offer discounts for homes that have been upgraded with modern, impact-resistant materials. To qualify for these “wind mitigation” or “fire safety” discounts, you will need to provide the insurance company with a copy of the final inspection report. This proves that the new siding meets the latest safety standards, making your home a lower risk for the insurer.
The “Notice of Completion” and Final Records
Once the project is finished and the final inspection is passed, make sure you receive a formal “Notice of Completion” or a “Certificate of Occupancy” from the building department. This is the ultimate proof that you have satisfied all siding replacement permit requirements. Store this document in a safe place, along with your contract and warranty information.
It is also a good idea to take photographs of the house at various stages of the project, especially the “underlayment” phase before the siding goes on. These photos, combined with the permit, provide a powerful “evidence package” if you ever need to sell the home or file an insurance claim. It shows that you did not cut corners and that the work was done to the highest standards.
In the digital age, many building departments keep these records online indefinitely. However, municipal databases can be lost or corrupted. Having your own hard copy of the closed permit is the only way to guarantee you can prove compliance twenty years from now. It is a small step that provides lifelong protection for your most valuable asset.
In conclusion, while the permit process may seem like an administrative burden, it is actually a vital component of homeownership. It ensures safety, protects your financial interests, and guarantees that your new siding will perform as expected for decades to come. By respecting the local laws and working within the system, you turn a simple renovation into a lasting investment in quality and peace of mind.