Cleaning Vinyl Siding Properly: The Ultimate Professional Guide
Maintaining the exterior of a home requires a strategic approach to preservation and aesthetics. Vinyl siding is a popular choice for modern homeowners due to its durability and low maintenance requirements. However, environmental pollutants, organic growth, and oxidative processes can dull its appearance over time. Learning the nuances of cleaning vinyl siding properly ensures that your investment remains protected for decades while delaying the inevitable need for a full vinyl siding replacement. This guide explores the sophisticated methodologies required to restore your home’s exterior to its original luster through evidence-based cleaning techniques.
The Structural Integrity of Vinyl Exterior Systems
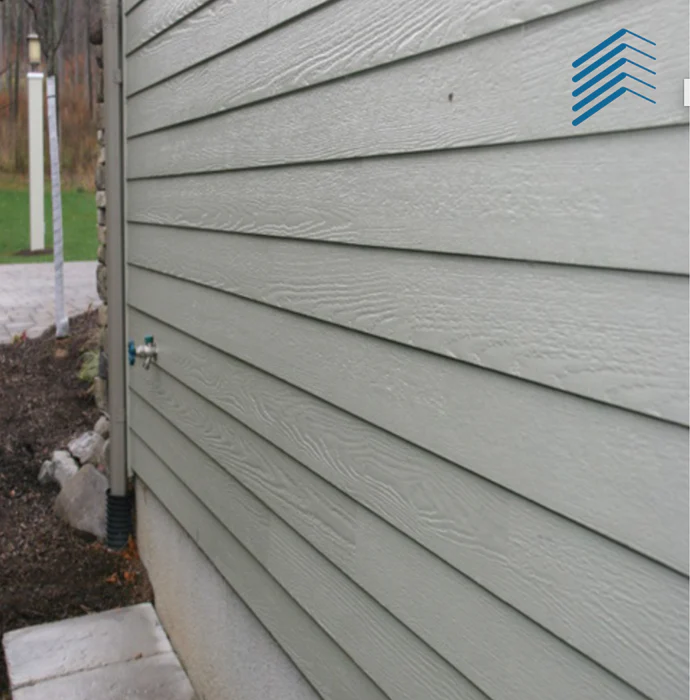
Vinyl siding is engineered to withstand various climatic conditions, ranging from extreme heat to freezing temperatures. Despite this resilience, the material is porous enough to host microscopic spores and trap airborne particulates. When these elements accumulate, they do more than just obscure the color of the panels. They can create a micro-environment that encourages the growth of mold and mildew, which may eventually penetrate the underlying structure if left unchecked.

Furthermore, the physical composition of polyvinyl chloride (PVC) is sensitive to certain chemical reactions. Using the wrong cleaning agents can lead to brittleness or “chalking,” a condition where the surface of the siding begins to degrade into a fine white powder. Understanding the chemistry of your siding is the first step toward effective maintenance. By choosing the right pH-balanced solutions, you can preserve the integrity of the material while achieving a deep clean.
In addition to physical preservation, the psychological impact of a clean home exterior cannot be overstated. Curb appeal is a primary factor in property valuation and neighborhood perception. A well-maintained exterior signals to potential buyers and neighbors that the home is cared for with precision. Consequently, regular cleaning schedules should be viewed as an essential component of long-term property management rather than a mere cosmetic chore.
Essential Tools for Exterior Surface Restoration
Before initiating the cleaning process, assembling the correct toolkit is vital for safety and efficiency. Many homeowners mistakenly believe that a high-pressure washer is the only tool necessary for the job. However, professional-grade results often come from a combination of manual agitation and low-pressure rinsing. Soft-bristle brushes with telescopic handles are indispensable for reaching high peaks without the risks associated with ladders.
If you choose to use a pressure washer, selecting the correct nozzle is paramount to preventing damage. A 40-degree “white” nozzle or a 25-degree “green” nozzle is generally recommended for vinyl surfaces. Using a 0-degree “red” nozzle can easily pierce the siding or force water behind the panels, leading to trapped moisture and potential rot within the wall cavity. Precision is far more important than raw power when handling delicate exterior materials.
| Tool Type | Specific Recommendation | Primary Function |
|---|---|---|
| Pressure Washer | Gas or Electric (1,500 – 2,400 PSI) | Rinsing and detergent application |
| Brushes | Soft-bristled with extendable poles | Agitating stubborn stains and oxidation |
| Nozzle Tips | 25 to 40-degree spread | Broad-spectrum cleaning without damage |
| Safety Gear | Goggles, gloves, and non-slip boots | Protection against chemical splashes and falls |
Cleaning Vinyl Siding Properly
Executing the task of cleaning vinyl siding properly requires a systematic approach that respects the physics of water runoff. One of the most common errors is starting from the top and working down. While this seems intuitive, it often results in dirty water running over dry, soiled surfaces, creating permanent streaks that are difficult to remove. The professional method involves applying cleaning solutions from the bottom up and rinsing from the top down.
This “bottom-to-top” application ensures that the cleaning agents have sufficient dwell time on the surface without being diluted by runoff from higher sections. During the application phase, the siding should remain wet to prevent the chemicals from drying and leaving a film. If you are working on a large home, it is advisable to work in manageable vertical sections of about ten feet in width. This ensures you can rinse each section before the detergent sets.
Furthermore, the angle of the water spray is a critical factor in preventing structural damage. Siding panels are designed to shed water that falls vertically, like rain. They are not designed to withstand high-pressure water directed upward into the “weep holes” or laps of the siding. Directing the spray downward or horizontally prevents water from becoming trapped behind the vinyl, which is a leading cause of mold growth in the home’s sheathing.
Chemical Solutions: Homemade vs. Commercial
The choice of cleaning solution often depends on the type of debris present on the siding. For general dirt and dust, a simple mixture of mild dish soap and water is frequently sufficient. However, for biological growth like mold or algae, more potent agents are required. A common homemade solution involves mixing 70% water with 30% white vinegar. This creates an acidic environment that is hostile to fungal growth while remaining safe for surrounding vegetation.
In contrast, commercial cleaners often utilize sodium hypochlorite (bleach) or sodium percarbonate (oxygen bleach). While chlorine bleach is highly effective at killing mold spores instantly, it can be harsh on the environment and may discolor certain types of vinyl if used in high concentrations. Oxygen-based cleaners are generally preferred by environmentalists as they break down into water and oxygen, providing a deep clean without the toxic runoff that can harm flower beds or lawns.
Addressing Oxidation and Chalking
Over years of exposure to UV radiation, vinyl siding undergoes a chemical process called oxidation. This manifests as a chalky white residue that can make even a clean house look dull and aged. Removing oxidation requires more than just a rinse; it necessitates physical agitation with a soft brush and a specialized surfactant. When cleaning vinyl siding properly, you must recognize that oxidation is a sign of the material’s surface degrading, and aggressive scrubbing is required to reveal the fresh layer beneath.
However, if the oxidation is severe and the siding feels brittle to the touch, cleaning may only provide a temporary aesthetic fix. In such cases, the structural integrity of the PVC may be compromised. This is often the stage where homeowners must evaluate the cost-effectiveness of continued maintenance versus a total vinyl siding replacement. If the panels crack or shatter during a gentle cleaning process, it is a definitive sign that the material has reached the end of its functional lifespan.
Safety Protocols for Outdoor Maintenance
Safety should never be compromised for the sake of a clean exterior. Working with water and electricity presents inherent risks, especially when using power washers. Always ensure that outdoor electrical outlets are covered and that you are using a Ground Fault Circuit Interrupter (GFCI). Furthermore, be mindful of overhead power lines when using long metal extension poles for brushes or sprayers. Conductivity can lead to fatal accidents if equipment comes into contact with live wires.
Ladder safety is another critical consideration. When reaching the second story of a home, ensure the ladder is placed on stable, level ground. Use a ladder stabilizer to prevent the top of the ladder from crushing the vinyl siding or sliding along the gutter line. Better yet, invest in a “soap shooter” nozzle for your pressure washer, which can project cleaning solutions up to 30 feet, allowing you to keep your feet firmly on the ground for the majority of the project.
Protecting Your Landscaping
The chemicals used to strip grime from your siding can be devastating to your garden. Many high-performance cleaners contain salts or acids that can dehydrate plants or alter soil pH levels. Before you begin, thoroughly saturate the soil and foliage around the perimeter of your house with fresh water. Wet leaves are less likely to absorb the runoff from your cleaning solutions, as the water acts as a protective barrier.
In addition to pre-wetting, consider covering delicate ornamental plants with plastic sheeting or tarps. Once the cleaning process is complete, rinse the plants again to ensure any chemical mist is washed away. This extra step preserves your landscaping investment and ensures that your home’s curb appeal is enhanced by both clean siding and vibrant, healthy greenery. Responsibility toward the local ecosystem is a hallmark of professional-grade maintenance.
The Impact of Biological Growth
Mold, mildew, and algae are the most common biological threats to vinyl siding. These organisms thrive in damp, shaded areas, which is why the north-facing side of a house often appears greener or darker than the rest. These growths are not just an eyesore; they can hold moisture against the siding, leading to localized cooling and potential warping over time. Furthermore, certain types of mold can release spores that find their way into the home’s HVAC system, affecting indoor air quality.
To combat this, the use of an antimicrobial wash is highly recommended. Products containing benzalkonium chloride or other “wet and forget” style chemicals can provide long-lasting protection. These agents bond to the surface of the vinyl and create a microscopic barrier that prevents spores from taking root. When cleaning vinyl siding properly, incorporating an antimicrobial step can significantly extend the time between cleanings, saving labor and resources in the long run.
Dealing with Rust and Mineral Stains
Rust stains often occur near outdoor fixtures, such as light mounts, mailboxes, or irrigation systems that use well water with high iron content. These orange streaks are notoriously difficult to remove with standard soaps. An oxalic acid-based cleaner is usually required to break the bond between the iron oxide and the vinyl. However, these acids are potent and must be used with extreme caution, following all manufacturer instructions regarding dilution and contact time.
Similarly, “hard water” spots caused by mineral deposits can leave a white, crusty film on the siding. This is particularly common in regions with high calcium carbonate levels in the municipal water supply. A mild acid, such as white vinegar or a dedicated calcium-lime-rust (CLR) remover, can dissolve these deposits. After treatment, rinsing with softened water or using a “spot-free” rinse agent—similar to those used in car washes—can prevent the minerals from redepositing as the surface dries.
The Role of Pressure Washing: Pros and Cons
Pressure washing is a polarizing topic in the world of exterior maintenance. When used correctly, it is a powerful time-saver that can strip away years of neglect in minutes. When used incorrectly, it is a destructive force that can strip paint, shatter vinyl, and inject gallons of water into the wall cavity. The key to successful pressure washing lies in the “Soft Wash” technique, which prioritizes chemical action over mechanical force.
In a soft wash setup, the pressure washer is used primarily as a delivery system for the cleaning solution. The pressure is dialed down to approximately 500-800 PSI—just enough to reach the second story. The chemicals do the heavy lifting of breaking down the dirt and killing the mold. After a brief dwell time, the machine is used to rinse the surface with a wide-angle nozzle. This approach minimizes the risk of physical damage while still reaping the benefits of mechanized cleaning.
| Feature | High-Pressure Washing | Soft Washing |
|---|---|---|
| Primary Force | Mechanical (Water Velocity) | Chemical (Surfactants/Biocides) |
| Risk of Damage | High (Cracking, water intrusion) | Very Low |
| Effectiveness on Mold | Surface level only | Deep-root elimination |
| Best Use Case | Concrete and masonry | Vinyl siding and roofing |
Seasonal Maintenance Schedules
Consistency is the secret to avoiding a massive, multi-day cleaning project. Ideally, vinyl siding should be inspected twice a year: once in the spring to remove winter’s accumulation of soot and salt, and once in the late fall to clear away pollen and organic debris. A light rinse with a garden hose every few months can prevent dirt from becoming “baked on” by the sun, making your annual deep clean much easier.
Seasonal timing also affects the efficacy of your cleaning agents. Avoid cleaning your home on extremely hot, sunny days. The heat will cause your cleaning solutions to evaporate almost instantly, leading to streaking and reducing the “kill time” for mold-fighting chemicals. Instead, choose an overcast day or work during the early morning hours when the siding is cool to the touch. This allows the soap to stay active longer, providing a more thorough result with less effort.
Preparation of the Work Area
Before any water is sprayed, the perimeter of the home must be secured. This involves more than just moving patio furniture. Ensure all windows and doors are tightly shut and that the seals are in good condition. Check for any gaps around dryer vents, light fixtures, or cable entries, and temporarily seal them with painter’s tape and plastic if necessary. These are common entry points for water that can lead to internal wall damage.
Additionally, notify your neighbors if you are using a pressure washer. The mist from the spray can travel significant distances on a windy day, potentially carrying chemicals onto their property or vehicles. Taking a few minutes to prep the environment ensures that the project proceeds without conflict or accidental damage. A professional mindset involves accounting for all variables, not just the ones directly in front of you.
When Cleaning is Not Enough: Identifying the Need for Replacement
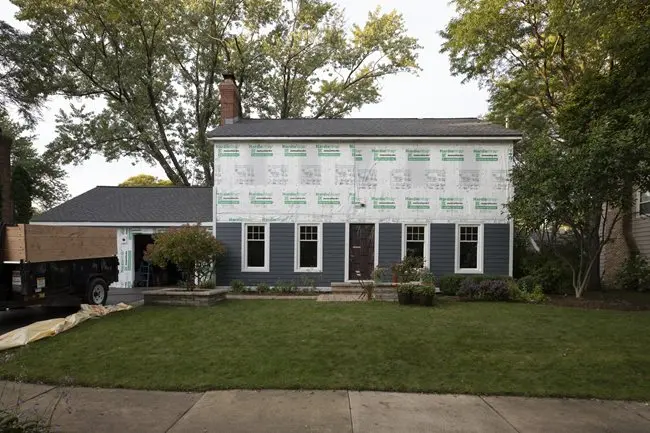
While cleaning vinyl siding properly can dramatically extend the life of your exterior, it cannot reverse the effects of extreme age or structural failure. There are specific signs that indicate your siding has moved past the point of maintenance and requires a full vinyl siding replacement. One such sign is warping or “oil canning,” where the panels have expanded and contracted so many times that they no longer sit flat against the house.
Another red flag is the presence of rot or mold on the interior walls of your home. This suggests that the siding’s moisture barrier has failed, allowing water to seep through. Furthermore, if you notice that your energy bills are rising and you can feel drafts coming through the walls, the siding may have lost its insulating properties. In these scenarios, spending money on professional cleaning is a poor investment; that capital would be better spent on new, energy-efficient siding materials.
The Economics of Maintenance vs. Replacement
A proactive cleaning regimen costs a fraction of a full replacement. On average, a professional exterior cleaning might cost between $300 and $600, whereas a full siding replacement can range from $10,000 to $25,000 depending on the size of the home and the quality of the materials. By investing in proper cleaning every year, you can easily push the lifespan of your vinyl siding from 15 years to 30 years or more.
This massive discrepancy in cost makes maintenance one of the highest-ROI activities a homeowner can perform. It preserves the home’s equity and prevents the catastrophic damage associated with water intrusion. However, a wise homeowner knows when to stop “patching” a sinking ship. If the cost of repairs and specialized cleaning starts to approach the down payment for new siding, it is time to consult with a contractor about modern replacement options that offer better durability and insulation.
Common Mistakes and How to Avoid Them
One of the most frequent errors in DIY siding maintenance is the use of abrasive tools. Steel wool, wire brushes, or even highly abrasive scouring pads can create microscopic scratches in the vinyl’s surface. These scratches trap dirt more easily and can permanently dull the finish of the panels. Always stick to soft-bristled brushes or microfiber cloths to protect the smooth exterior of the PVC.
Another mistake is using undiluted chemicals. While it might be tempting to use “extra strength” bleach to tackle a stubborn patch of mildew, this often leads to localized discoloration. Always follow the manufacturer’s dilution ratios. If a stain is particularly persistent, it is better to apply a mild solution multiple times rather than a single, overly-concentrated application. Patience and repetition are the keys to safe and effective cleaning.
Finally, do not overlook the importance of rinsing. Residual soap left on the siding will attract dust and pollen like a magnet, causing the home to look dirty again within weeks. You should rinse the siding until the water running off the bottom of the house is perfectly clear and no bubbles are visible. This ensures that the surface is “chemically clean” and ready to repel the elements.
Environmental Impact and Sustainable Practices
As homeowners become more environmentally conscious, the demand for “green” cleaning methods has skyrocketed. Traditional cleaning agents can be harmful to local watersheds if they are allowed to enter storm drains. To mitigate this, consider using biodegradable soaps that are specifically labeled as “phosphate-free.” Phosphates are a major contributor to algae blooms in local ponds and lakes, which can deplete oxygen levels and kill aquatic life.
Furthermore, managing water usage is an essential part of sustainable maintenance. A pressure washer actually uses significantly less water than a standard garden hose because it atomizes the water into a high-velocity spray. By using a pressure washer effectively, you can clean your home more thoroughly while consuming a fraction of the total water volume. This efficiency is both a cost-saving measure and a responsible environmental choice.
DIY vs. Professional Services
Deciding whether to tackle the job yourself or hire a professional depends on your comfort with heights and your access to equipment. A professional service brings specialized knowledge regarding chemical mixing and high-reach safety. They are also insured, meaning that any accidental damage to the home is covered. For multi-story homes with complex architectural features, the cost of a professional clean is often worth the peace of mind and the superior results.
However, for a standard single-story ranch or a home with easily accessible walls, DIY cleaning is a manageable weekend project. It provides a sense of accomplishment and allows you to inspect your home’s exterior closely for any signs of damage or wear. If you choose the DIY route, ensure you have a partner to help manage the hose and keep an eye on the ladder. Safety and precision should always be your top priorities when cleaning vinyl siding properly.
Maintaining Trim, Soffits, and Gutters
The siding is only one part of your home’s exterior system. To achieve a truly polished look, you must also clean the trim, soffits, and gutters. Soffits—the underside of the roof overhang—are particularly prone to attracting cobwebs and wasp nests. Use a soft brush to clear these away before applying any water. Because soffits are often vented, be extremely careful not to spray water directly into the vents, as this can lead to moisture buildup in your attic.
Gutters often suffer from “tiger striping,” which are dark vertical lines caused by electrostatic bonding of pollutants to the aluminum or vinyl surface. These stripes are incredibly resilient and usually require a specialized “gutter grenade” or butyl-based cleaner to remove. Cleaning these peripheral elements ensures that the entire facade of the home looks uniform. A clean house with dirty gutters is an incomplete job that detracts from the overall aesthetic impact.
The Final Inspection
Once the house is dry, perform a final walk-through. Look at the siding from different angles and in different lighting conditions to ensure there are no missed spots or streaks. This is also the best time to check for any loose panels or failing caulk around windows and doors. Modern vinyl siding systems rely on a combination of overlapping panels and high-quality sealants to keep the home watertight. Identifying minor issues during your cleaning process allows you to address them before they become expensive repairs.
In conclusion, the longevity and beauty of your home’s exterior are directly related to the quality of your maintenance routine. By understanding the chemistry of your siding and employing the correct tools and techniques, you can keep your home looking new for decades. Whether you are prepping for a sale or simply taking pride in your property, cleaning vinyl siding properly is a fundamental skill for every homeowner. It is the bridge between a house that merely provides shelter and a home that displays excellence in every detail.