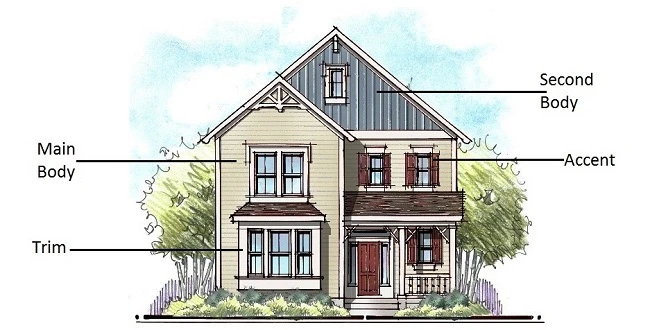
Cheapest Way to Replace Siding: The Ultimate Budget Homeowner’s Guide
Homeowners often face a daunting financial challenge when their exterior cladding begins to fail. Cracking, warping, or persistent moisture infiltration can compromise the structural integrity of a residence. Consequently, finding the cheapest way to replace siding becomes a top priority for those balancing a strict budget with the necessity of home maintenance. While high-end materials like cedar or fiber cement offer undeniable aesthetic appeal, they often come with a price tag that is prohibitive for the average family. Understanding how to navigate the complexities of material selection, labor costs, and timing is essential for achieving a high-quality result without overspending.
The journey toward a cost-effective exterior renovation begins with a thorough assessment of your home’s specific needs. Not every project requires a full-scale teardown and replacement. In many instances, strategic repairs or targeted upgrades can provide the protection your home needs at a fraction of the cost. However, when the time comes for a total overhaul, vinyl remains the undisputed champion of affordability. By dissecting the various layers of the replacement process, we can uncover hidden savings that most contractors might not volunteer during the initial consultation. This guide explores every avenue available to minimize your expenditure while maximizing the longevity of your home’s new exterior.
Evaluating the True Condition of Your Exterior
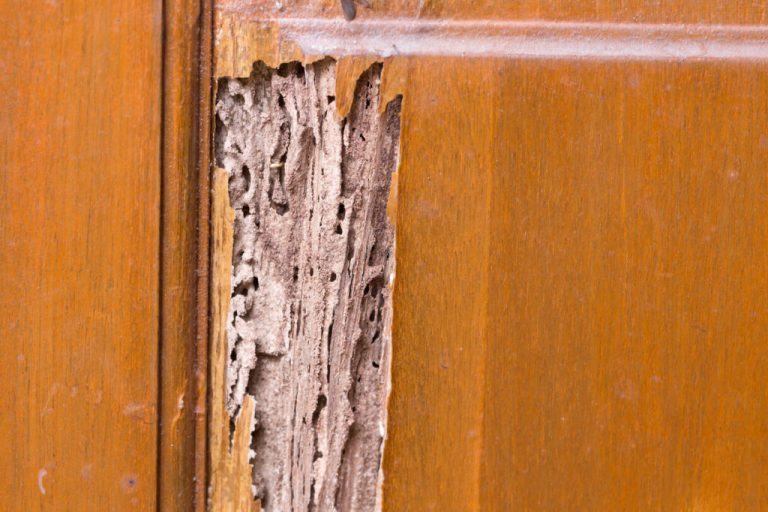
Before committing to a massive financial outlay, it is vital to determine if a full replacement is truly necessary. Many homeowners assume that faded or dirty siding indicates a failure of the material. However, professional cleaning or a fresh coat of specialized paint can often extend the life of existing siding for several years. You should inspect your walls for soft spots, rot, or significant insect damage, as these are the primary indicators that replacement is the only viable path forward. If the underlying structure is sound, you might be able to delay the project until you have secured more favorable pricing or saved more capital.
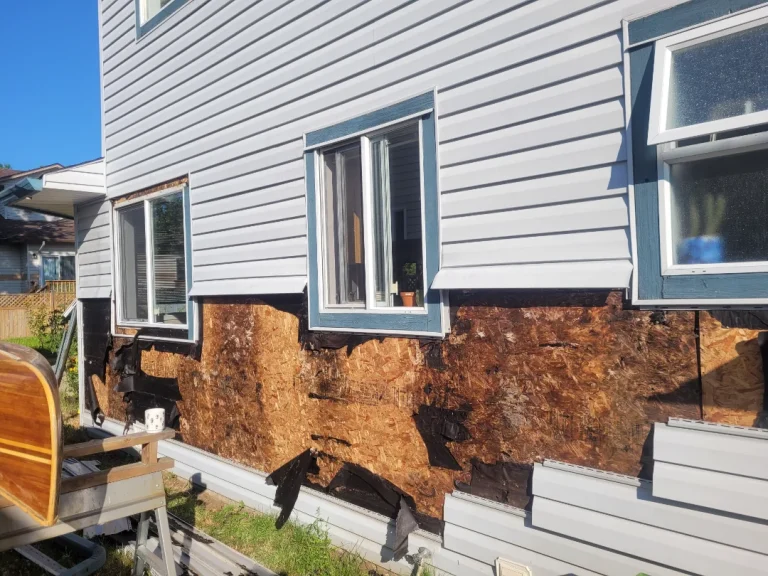
Moisture is the greatest enemy of any home’s envelope. If you notice peeling interior paint or mold growth near exterior walls, the siding may be allowing water to seep behind the protective barrier. In these cases, the cheapest way to replace siding involves addressing the issue immediately before it evolves into a structural catastrophe. Delaying a necessary replacement can lead to wood rot in the wall studs and sheathing, which exponentially increases the final repair bill. A proactive approach allows you to control the scope of work and avoid emergency labor rates that typically apply during peak damage seasons.
The Economics of Patchwork Repairs
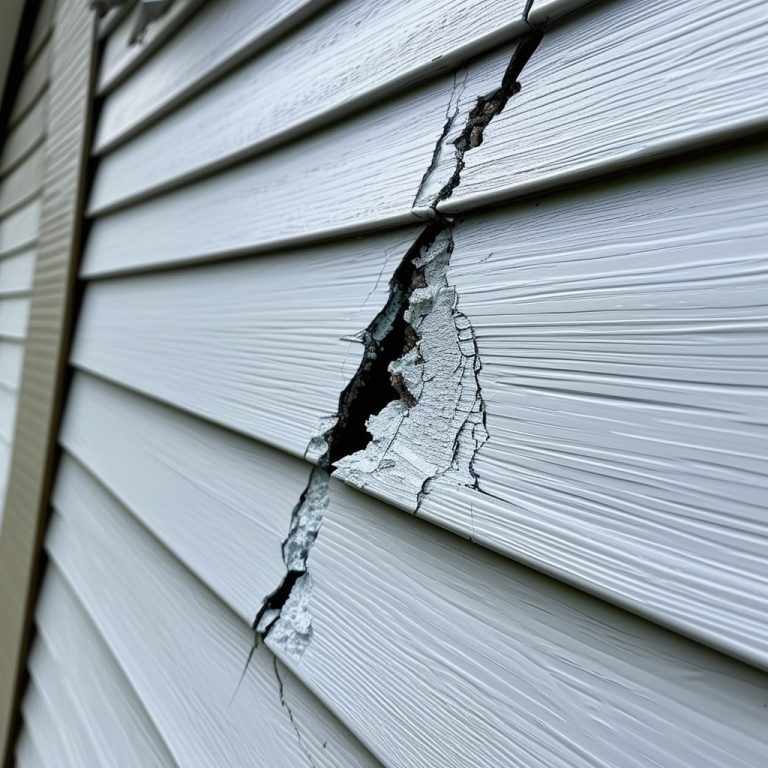
In some scenarios, you only need to replace specific sections of siding that have been damaged by hail, localized rot, or mechanical impact. This “patch and match” strategy is frequently the most budget-friendly option for homeowners. The main challenge lies in matching the color of the new panels with the existing ones, which may have faded due to UV exposure. To mitigate this, many experts suggest taking a piece of siding from a less visible area of the house, such as the back of a garage, and using it for the repair. You can then install the new, slightly mismatched panels in the hidden location.
Furthermore, if your home uses horizontal lap siding, replacing individual boards is a relatively straightforward task for a motivated DIYer. By utilizing a “zip tool,” you can unlock vinyl panels without damaging the surrounding pieces. This precision allows for surgical interventions that save thousands of dollars compared to a full-wall replacement. Always ensure that the flashing and house wrap behind the repaired section remain intact to prevent future leaks. Consistency in your inspection routine will help you catch these small issues before they necessitate a complete overhaul of the property’s exterior.
Cheapest way to replace siding
When looking for the absolute cheapest way to replace siding, vinyl is consistently the top recommendation from industry professionals. The material itself is manufactured from polyvinyl chloride (PVC), which is relatively inexpensive to produce and distribute. Unlike wood, which requires harvesting, milling, and treating, vinyl is extruded in high volumes with minimal waste. Its lightweight nature also reduces shipping costs, a factor that is often overlooked but significantly impacts the final retail price. For the budget-conscious homeowner, standard-grade vinyl provides the best balance of cost and durability.
Another factor that makes vinyl the cheapest option is the speed of installation. Labor typically accounts for 50% to 60% of a siding project’s total cost. Because vinyl panels are designed with interlocking tracks and pre-punched nailing slots, a skilled crew can finish a home in a fraction of the time it would take to install fiber cement or natural stone. Reducing the number of man-hours required for the job directly translates to lower quotes from contractors. Additionally, vinyl does not require painting or sealing after installation, saving you hundreds of dollars in material and labor costs immediately upon completion.
Selecting Economy Grade Materials
Not all vinyl siding is created equal, and understanding the “mil” thickness is key to saving money. Builder-grade vinyl typically ranges from 0.038 to 0.040 inches thick. While this is the most affordable tier, it is also the thinnest and most prone to cracking over time. If you are looking for the absolute lowest entry price, this is where you will find it. However, many experts suggest moving up just one tier to a “standard” grade (0.042 inches), as the marginal price increase is often offset by a significantly longer lifespan and better resistance to wind and impact.
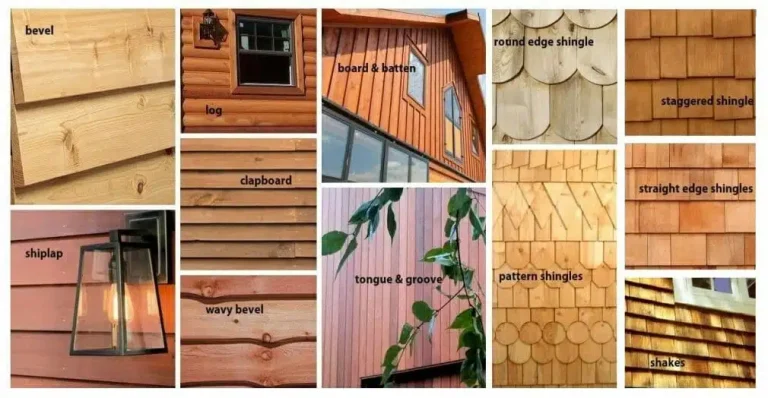
In addition to thickness, the profile of the siding affects the price. Traditional “D4” (double 4-inch) lap siding is usually the most affordable because it is the most common. Exotic profiles, such as Dutch lap, board and batten, or cedar-shake impressions, carry a premium price tag. By sticking to standard horizontal profiles in common colors like white, beige, or light gray, you can take advantage of high-volume manufacturing discounts. These colors are also easier to source from local suppliers, reducing the likelihood of expensive special-order fees or long wait times.
Analyzing Material Costs Across the Industry
To truly understand your budget, you must compare vinyl against other popular materials. While vinyl is the leader in affordability, other options might be viable if you find a clearance deal or have a smaller surface area to cover. The following table illustrates the approximate cost per square foot for various materials, including both the product and estimated basic labor. Note that these prices can vary based on your geographic location and the complexity of your home’s architecture.
| Siding Material | Material Cost (per sq. ft.) | Installed Cost (per sq. ft.) | Average Lifespan |
|---|---|---|---|
| Standard Vinyl | $1.00 – $2.50 | $3.50 – $7.50 | 20 – 40 Years |
| Aluminum Siding | $2.50 – $4.50 | $6.00 – $11.00 | 30 – 50 Years |
| Fiber Cement (James Hardie) | $2.00 – $5.00 | $8.00 – $15.00 | 30 – 50 Years |
| Engineered Wood (LP SmartSide) | $2.50 – $4.00 | $7.00 – $13.00 | 20 – 50 Years |
| Natural Cedar Shakes | $5.00 – $9.00 | $12.00 – $25.00 | 20 – 30 Years |
As indicated by the table, vinyl remains the clear winner for those seeking the lowest financial barrier to entry. While fiber cement is highly durable and fire-resistant, the labor costs are substantially higher because the material is heavy and requires specialized cutting tools. Engineered wood is a mid-range contender that offers a more natural look, but it still cannot compete with the raw affordability of vinyl. By analyzing these figures, homeowners can see why the cheapest way to replace siding almost always involves a vinyl-based solution.
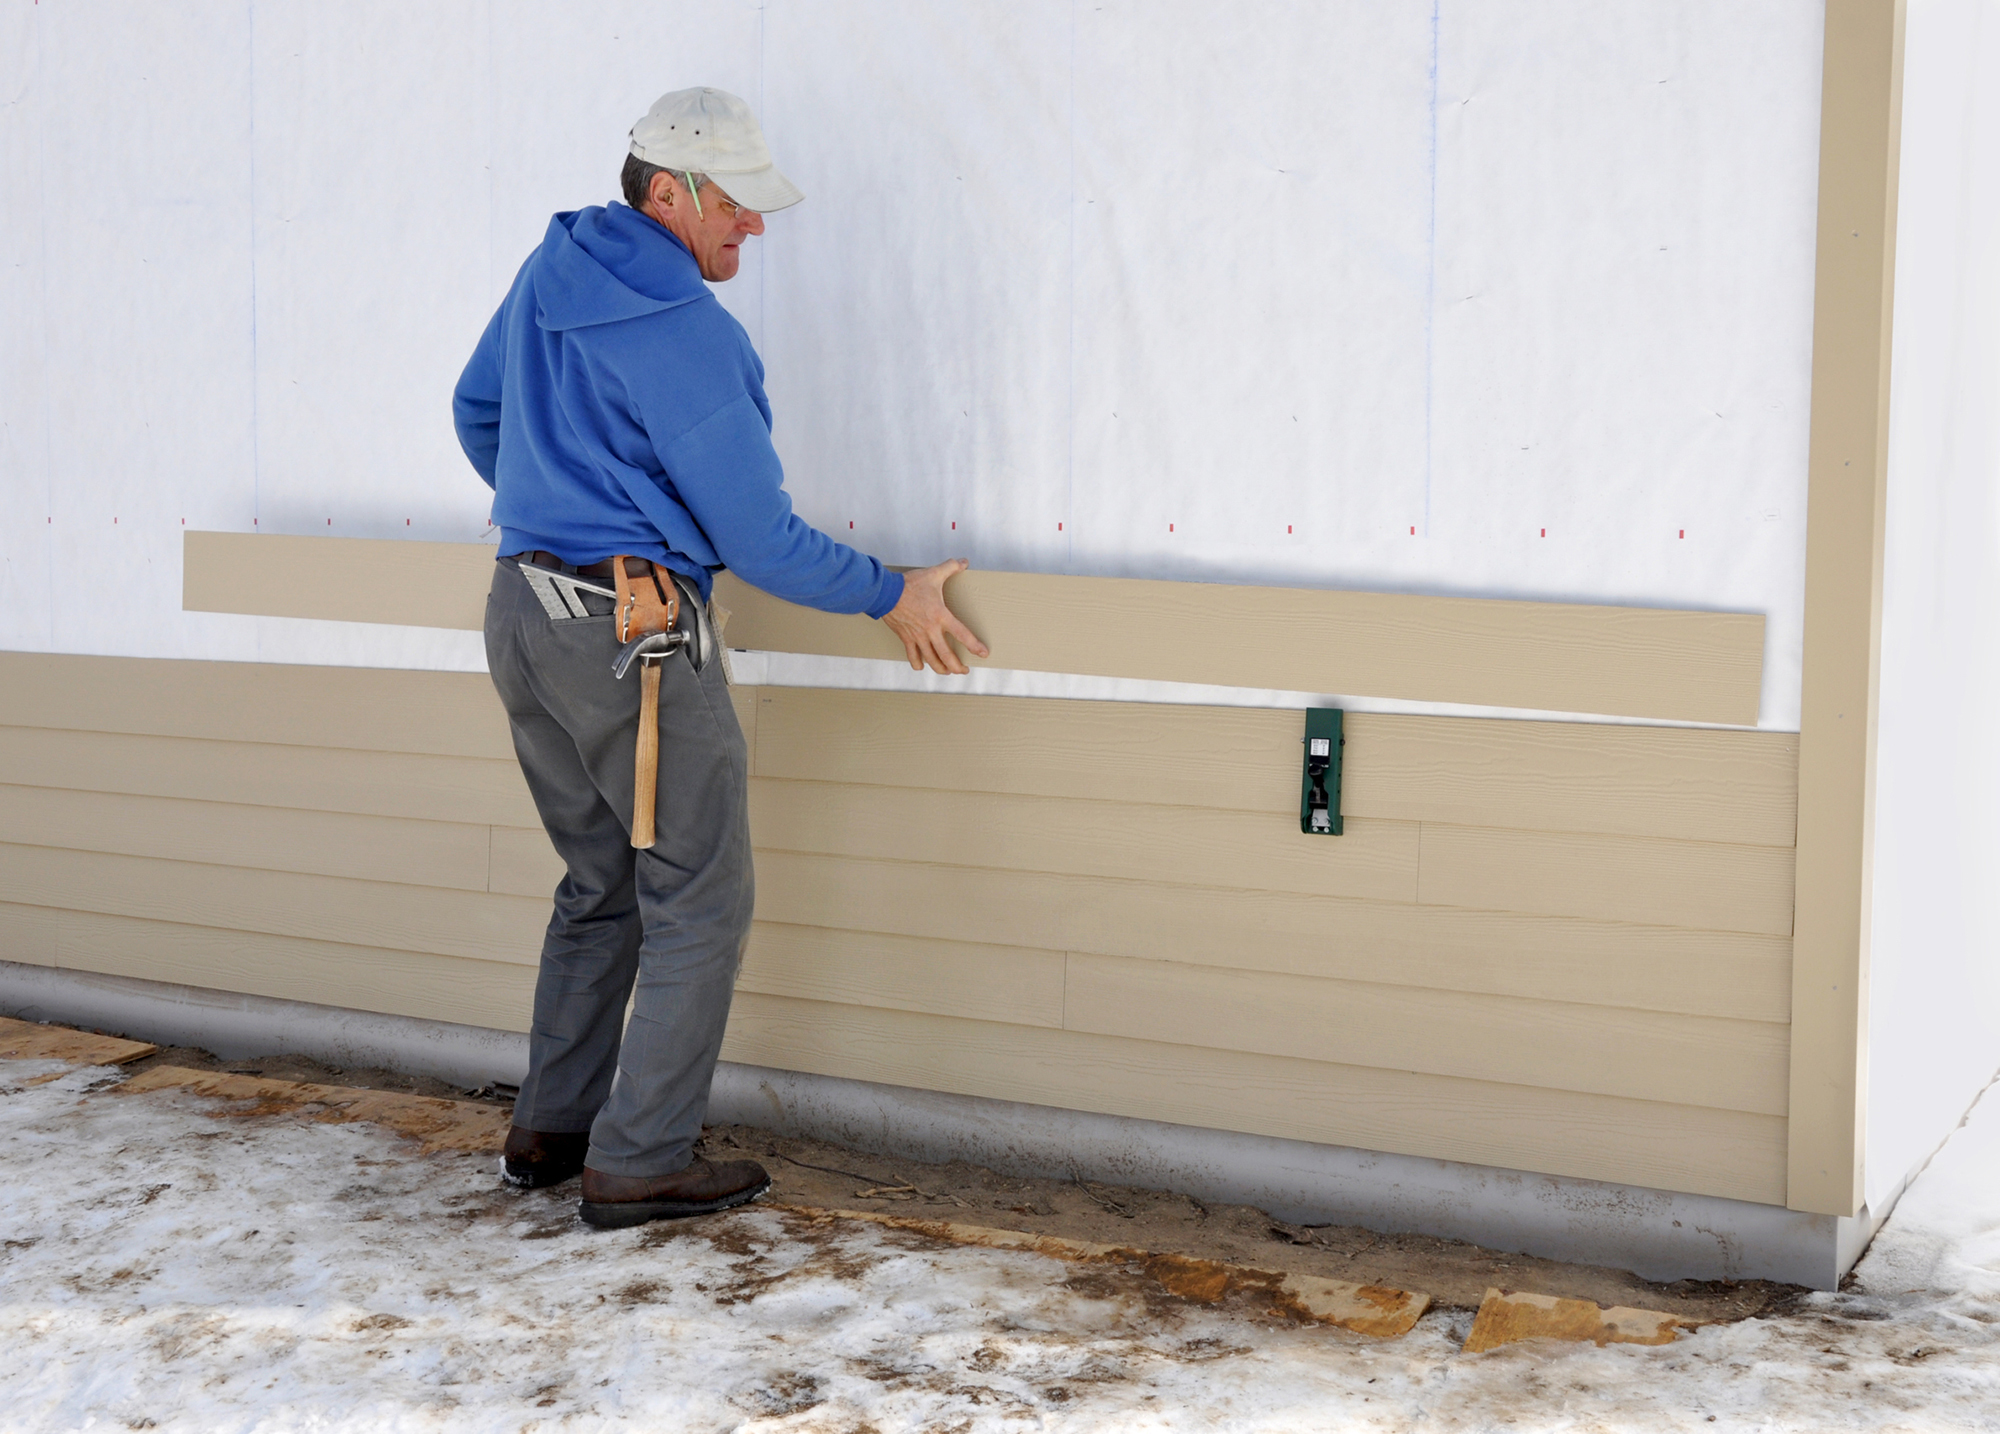
The DIY vs. Professional Installation Dilemma
For the truly budget-conscious, the question of whether to perform the installation yourself is inevitable. Handling the labor personally is arguably the single most effective way to slash your expenses. If you have the tools, time, and physical ability, you can potentially save thousands of dollars. However, siding installation is not merely about nailing boards to a wall; it involves complex flashing around windows, proper overlapping to prevent leaks, and understanding the expansion and contraction of PVC materials. If done incorrectly, a DIY job can lead to moisture damage that costs far more to fix than the original labor savings.
If you decide to hire a professional, you can still save money by being your own project manager. Instead of hiring a large, well-known exterior remodeling firm with high overhead, look for local owner-operated crews. These smaller teams often have lower marketing costs and can pass those savings on to you. Always solicit at least three to five quotes to ensure you are getting a fair market rate. Be wary of quotes that are significantly lower than others, as this may indicate a lack of insurance or an intention to use sub-par materials that won’t stand the test of time.
Essential Tools for a Budget DIY Project
Should you choose the DIY path, you will need to invest in or rent a specific set of tools. To keep the project the cheapest way to replace siding, avoid buying premium power tools for a one-time job. Many local hardware stores offer tool rental programs for items like scaffolding or power miter saws. However, you will need to own basic hand tools. A proper vinyl siding cutter or a fine-tooth saw blade is necessary to ensure clean edges, and a sturdy hammer or pneumatic roofing nailer will speed up the process significantly.
Do not overlook safety equipment. Working on ladders or scaffolding carries inherent risks, and medical bills will quickly erase any savings gained from doing the labor yourself. Invest in a high-quality fall arrest system if you are working on a second story. Additionally, a “snap lock” tool and a hole punch are specialized items specific to vinyl installation that allow you to secure panels into the top trim and around utilities. Having the right tools on hand prevents material waste and ensures the finished product looks professional, protecting your home’s resale value.
Strategic Timing for Maximum Savings
Most homeowners wait until the weather is perfect—usually late spring or early summer—to begin exterior projects. Because demand is at its peak during these months, contractors can afford to charge premium rates. If you are looking for the cheapest way to replace siding, consider scheduling your project during the “off-season.” In many climates, late autumn or early winter is a slow period for siding installers. During these months, crews may be willing to offer significant discounts just to keep their workers employed and avoid a total work stoppage.
In addition to labor discounts, material prices can fluctuate based on the time of year. Manufacturers often release new product lines or color palettes in the early spring. Consequently, suppliers may be looking to clear out “last year’s” inventory during the winter months. By being flexible with your timeline, you can negotiate better rates with both the supplier and the installer. Just ensure the weather is not so cold that the vinyl becomes brittle; working in temperatures below 40 degrees Fahrenheit requires extra care to prevent the panels from cracking during cutting and nailing.
Exploiting Supplier Clearances and Overstock
Large-scale construction projects often over-order materials, resulting in “leftovers” that are sold at deep discounts. You can find these opportunities by visiting local wholesale building supply yards rather than the big-box home improvement stores. Ask the manager if they have any “orphan” pallets of siding. These are typically high-quality materials that were returned or never picked up by another contractor. If you are not picky about a specific shade of tan or gray, you can often secure premium siding for the price of builder-grade stock.
Another resource for affordable materials is the Habitat for Humanity ReStore or similar architectural salvage yards. While finding enough matching siding for an entire house is rare, these outlets are excellent for sourcing trim pieces, J-channels, and starter strips. Since these accessory components can add 20% to your total material cost, getting them for pennies on the dollar is a smart financial move. Combining salvage finds with new main panels is a savvy tactic for anyone committed to the cheapest way to replace siding without sacrificing the quality of the installation.
The Benefits of Partial Replacement and Strategic Overlays
In some jurisdictions, building codes allow for “over-siding,” which involves installing new siding directly over the existing material. This technique is often the cheapest way to replace siding because it eliminates the need for a costly tear-off and disposal phase. By leaving the old siding in place, you save on labor and dumpster rental fees. However, this method is only advisable if the existing siding is flat and the underlying structure is completely free of rot. If you trap moisture or rot behind new panels, you are merely hiding a problem that will eventually destroy your home’s framing.
If you choose to overlay, you must use a layer of fan-fold foam insulation between the old and new siding. This provides a flat surface for the new panels and adds a small amount of thermal resistance (R-value) to your walls. While this adds a minor material cost, the savings from skipped demolition usually outweigh it. Ensure that your contractor uses extra-long nails to penetrate through the new siding, the foam, and the old siding into the wall studs. A firm connection is vital for preventing the new exterior from sagging or blowing off during high winds.
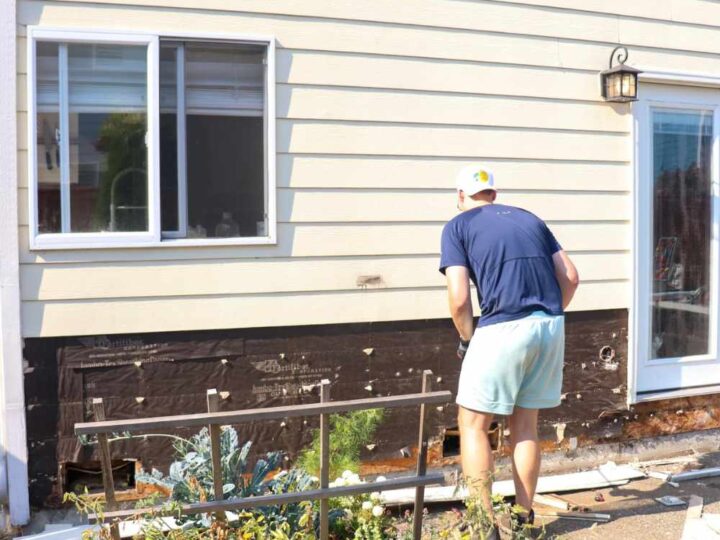
Managing Demolition Yourself to Save on Labor
If an overlay is not an option, you can still save money by performing the demolition yourself. Removing old vinyl or wood siding is a labor-intensive but relatively unskilled task. By spending a weekend stripping the old material and pulling nails, you can save several hundred to over a thousand dollars in professional labor fees. Most contractors are happy to have the “dirty work” already finished, as it allows them to focus on the high-skill installation phase. Be sure to have a plan for disposal, as many municipalities have strict rules regarding construction waste.
When performing your own demolition, take care not to damage the underlying house wrap or the window flashing. If your home was built before 1978, be extremely cautious about lead-based paint on old wood siding. In such cases, professional remediation is often required by law to prevent toxic dust from contaminating your property and the surrounding neighborhood. However, for modern vinyl-to-vinyl replacements, a simple pry bar and a pair of sturdy work gloves are usually all you need to clear the way for your new, budget-friendly exterior.
Negotiation Tactics for Lower Contractor Quotes
When you begin receiving quotes, do not assume the first price is the final price. Many contractors build a “buffer” into their estimates to account for unexpected complications. If you are a flexible and organized client, you can negotiate this buffer down. Offer to handle the cleanup or the procurement of the materials yourself. By taking these tasks off the contractor’s plate, you reduce their risk and overhead, which should be reflected in a lower labor rate. Being clear about your budget constraints from the start can also lead the contractor to suggest more affordable material alternatives.
Another powerful negotiation tool is the “referral discount.” If you live in a neighborhood where many homes are of a similar age, your neighbors likely need new siding too. Approach a contractor and ask for a group rate if they can sign two or three houses in the same block. This is highly efficient for the contractor because they can move their equipment and crew once and keep them busy for several weeks. The savings on mobilization and marketing are often significant enough for the contractor to offer a substantial discount to everyone involved, making it the cheapest way to replace siding for the entire community.
Understanding the Fine Print in Contracts
To avoid hidden costs that can blow your budget, read every line of your siding contract. Ensure the quote includes the cost of permits, disposal, and the replacement of any rotted sheathing discovered during the tear-off. Some low-ball contractors will lure you in with a cheap base price but then “nickel and dime” you for every small accessory or unexpected repair. A comprehensive contract protects you from these predatory practices. If a contractor refuses to provide a detailed, written estimate, it is a red flag that you should look elsewhere.
Ask specifically about the warranty. A cheap installation is not a bargain if it fails in three years and has no coverage. Most reputable manufacturers offer a limited lifetime warranty on the vinyl itself, but the installer should also provide a workmanship warranty of at least one to two years. This ensures that if a panel comes loose or a piece of trim was installed incorrectly, they will return to fix it at no additional cost. Investing in a reliable professional may cost slightly more upfront but is the cheapest way to replace siding in the long run by avoiding costly corrective work.
Maximizing Long-Term Value and Energy Efficiency
While the focus is on the cheapest way to replace siding, it is wise to consider the “total cost of ownership.” Choosing an insulated vinyl product, for instance, costs more initially but can significantly lower your monthly heating and cooling bills. In some regions, utility companies or government agencies offer rebates or tax credits for installing energy-efficient exterior cladding. These financial incentives can effectively lower the net cost of the project, allowing you to afford a higher-quality material for the same out-of-pocket expense as basic vinyl.
Furthermore, the color and style you choose will impact your home’s resale value. Neutral, widely appealing colors are usually the most cost-effective because they attract the largest pool of potential buyers. If you plan to sell your home within the next five to ten years, a siding replacement is one of the highest ROI (Return on Investment) projects you can undertake. According to industry data, homeowners often recoup 60% to 75% of the cost of a vinyl siding replacement upon the sale of the house. This high recovery rate makes the project an investment rather than just an expense.
The Role of Maintenance in Avoiding Future Costs
Once your new siding is installed, the key to keeping it the cheapest way to replace siding is proper maintenance. Vinyl is touted as “maintenance-free,” but it still requires occasional cleaning to prevent the growth of mold and mildew. A simple wash with a garden hose and a soft-bristled brush once a year is usually sufficient. Avoid using a high-pressure power washer, as the force can drive water behind the panels and into your wall cavity, leading to the very rot you were trying to prevent.
Regular inspections are equally important. After a heavy storm, walk around the perimeter of your home to look for loose panels or damaged trim. Modern vinyl is designed to be flexible, but extreme winds or large hail can still cause damage. By catching these issues early and performing small repairs, you prevent the need for another major replacement project in the future. A well-maintained vinyl exterior can easily last 30 years or more, providing decades of protection and curb appeal for a relatively modest initial investment.
Navigating Local Building Codes and Permits
Many homeowners try to save money by skipping the permit process. However, this is a risky strategy that can lead to heavy fines and complications when you eventually try to sell your home. Most municipalities require a permit for siding replacement to ensure the work meets fire safety and moisture barrier standards. The fee for a permit is usually a small fraction of the total project cost. By following the rules, you ensure that the installation is inspected by a third party, providing an extra layer of quality control over your contractor’s work.
In addition to city permits, if you live in a neighborhood with a Homeowners Association (HOA), you must gain their approval before changing your siding. HOAs often have strict rules regarding colors and materials to maintain a uniform aesthetic. Failing to get approval can result in the HOA forcing you to tear down the new siding and replace it with an approved version at your own expense. This would be the opposite of the cheapest way to replace siding. Always check your bylaws and submit a formal request with material samples before the work begins to avoid a legal and financial nightmare.
The Impact of Trim and Accessory Choices
When budgeting for siding, many people focus only on the main panels and forget about the accessories. Items like J-channel, corner posts, soffit, and fascia can add thousands to the final bill. To keep costs low, consider using “color-matched” vinyl accessories rather than custom-wrapped aluminum trim. Aluminum trim requires a specialized tool called a “brake” and a high level of skill to install, which drives up labor costs. Standard vinyl corner posts and J-channels are much faster and cheaper to install.
Moreover, you can save money by simplifying the design. Features like decorative gables, shutters, and intricate molding add a lot of visual interest but also require more labor and materials. If your goal is the cheapest way to replace siding, stick to a clean, simple look. You can always add decorative elements like shutters or window boxes later as your budget allows. By focusing the majority of your funds on the primary protective barrier, you ensure the home is safe and dry without overspending on purely cosmetic flourishes.
Final Thoughts on Budget-Friendly Siding
Replacing the siding on your home is a major undertaking, but it does not have to be a financial burden. By choosing vinyl, timing your project strategically, and perhaps contributing some of your own labor, you can achieve a professional result on a shoestring budget. The key is to be informed and proactive. Don’t wait for a total failure of your current exterior; instead, plan your replacement while you still have the luxury of time to shop for deals and negotiate with contractors. A focused, analytical approach will always yield the best results.
Ultimately, the cheapest way to replace siding is the one that balances immediate savings with long-term durability. While it may be tempting to cut every corner possible, investing in a proper moisture barrier and a standard-grade vinyl will protect your home’s value for decades. By following the strategies outlined in this guide, you can navigate the complex world of home renovation with confidence, ensuring your home remains beautiful, efficient, and well-protected without breaking the bank. Your home is your greatest asset; treating its exterior with care and financial wisdom is the smartest move any homeowner can make.