Vinyl Siding Maintenance Checklist: The Pro Guide to Longevity
Maintaining the exterior of your home is a multifaceted responsibility that directly influences both the aesthetic appeal and the structural integrity of your property. While modern building materials are designed for longevity, neglecting a regular vinyl siding maintenance checklist can lead to premature degradation and costly repairs. Homeowners often choose vinyl because of its reputation for being “low maintenance,” but low maintenance does not equate to “no maintenance.”
A proactive approach ensures that your home remains protected against the elements while preserving its market value. By understanding the specific needs of polyvinyl chloride (PVC) materials, you can extend the lifespan of your exterior by decades. This comprehensive guide serves as an authoritative resource for homeowners seeking to master the nuances of exterior preservation and determine when a simple cleaning is enough or if a full replacement is on the horizon.
Vinyl siding acts as a protective skin for your residence, shielding the internal framework from moisture, wind, and UV radiation. However, this skin is subject to environmental stressors that can compromise its effectiveness over time. Through a systematic evaluation of your home’s exterior, you can identify minor issues before they escalate into systemic failures that require professional intervention.
The Structural Composition of Modern Vinyl Siding
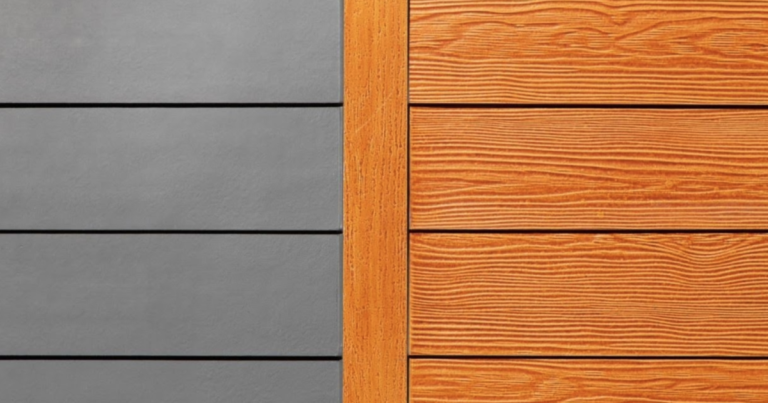
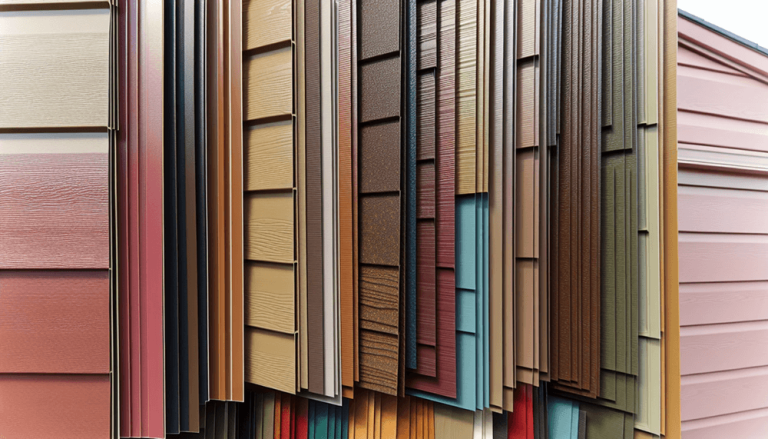
To effectively maintain your home’s exterior, it is essential to understand what vinyl siding actually is. Modern siding is composed of two layers: the top layer, known as the capstock, and the bottom layer, known as the substrate. The capstock contains UV stabilizers and pigments that protect the panel from sun damage, while the substrate provides structural rigidity and impact resistance.
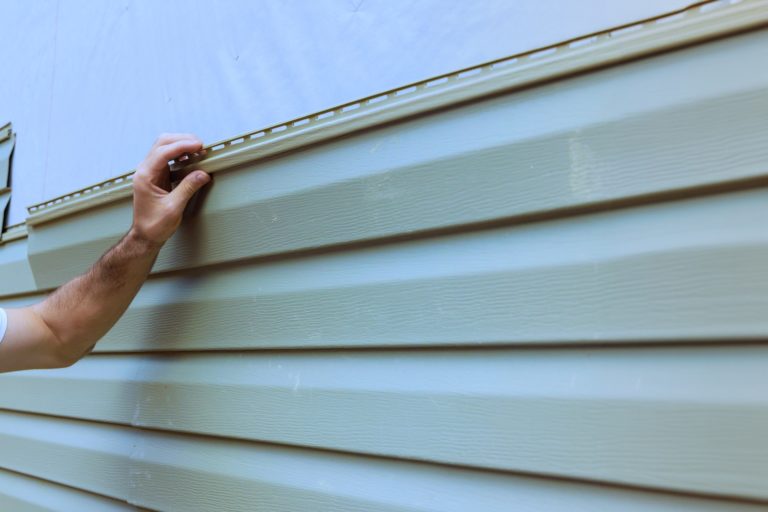
Furthermore, vinyl is designed to be a “floating” system. Unlike wood or fiber cement, which are nailed tightly to the wall, vinyl siding is hung loosely on the nails to allow for thermal expansion and contraction. Understanding this mechanical property is crucial during your vinyl siding maintenance checklist inspections, as it explains why panels may appear slightly loose or why they might “rattle” during high winds.
When these panels are restricted from moving, they can buckle, warp, or crack. Consequently, maintenance isn’t just about cleaning dirt; it’s about ensuring the mechanical system of the siding remains functional. Proper airflow behind the panels is also vital, which is why “weep holes” are integrated into the bottom edges of the planks to allow moisture to escape.
The Role of Additives in Durability
The quality of your siding depends heavily on the chemical additives used during the manufacturing process. Titanium dioxide is a common additive used to prevent UV degradation and color fading. Higher-quality siding typically contains higher concentrations of these stabilizers, making them more resilient to the harsh American sun.
In addition to UV protection, impact modifiers are included to prevent the vinyl from becoming brittle in cold temperatures. If you live in a region with significant temperature swings, your maintenance routine should focus heavily on inspecting for cracks after a hard freeze. Brittle siding is prone to “star cracks” caused by hail or even a stray baseball.
Vinyl Siding Maintenance Checklist
This comprehensive vinyl siding maintenance checklist is designed to be performed at least twice a year—ideally in the spring and autumn. Regular inspections allow you to catch issues like mold growth, loose panels, or insect infestations before they compromise the sheathing of your home.
| Inspection Area | What to Look For | Recommended Action |
|---|---|---|
| Panel Integrity | Cracks, chips, or holes from impacts. | Patch small holes with vinyl-safe caulk or replace the entire panel. |
| Seams and Joints | Gaps that have widened or panels that have come unhooked. | Re-snap the interlocking channels using a zip tool. |
| Surface Cleanliness | Mildew, algae, or “chalking” (oxidation). | Wash with a soft-bristle brush and a mild detergent solution. |
| Fascia and Soffit | Water stains or sagging sections. | Check for roof leaks or blocked gutters that overflow onto the siding. |
| Weep Holes | Dirt, debris, or insect nests blocking the holes. | Clear blockages with a small wire or pipe cleaner to ensure drainage. |
| Thermal Expansion | Buckling or warped panels. | Loosen nails that were driven too tightly into the hem. |
By following this vinyl siding maintenance checklist systematically, you can identify the difference between superficial dirt and structural failure. It is often the small, overlooked details—like a blocked weep hole—that lead to major rot issues in the wall studs beneath the siding.
Detailed Cleaning Protocols for Longevity
Cleaning is the most visible part of any vinyl siding maintenance checklist. Over time, your siding will accumulate atmospheric pollutants, pollen, bird droppings, and spider webs. If left unaddressed, these contaminants can provide a food source for mold and mildew, which can eventually find its way into your home’s interior.
When cleaning, the goal is to remove the debris without damaging the finish of the vinyl. Many homeowners reach for a pressure washer immediately, but this can be a mistake if not handled with extreme care. High-pressure water can be forced behind the panels, soaking the insulation and house wrap, leading to mold growth inside the walls.
Instead, the preferred method is a “soft wash.” This involves applying a cleaning solution and using a soft-bristled brush on a telescoping pole. Scrubbing from the bottom up ensures that you don’t miss spots, while rinsing from the top down ensures that dirty water doesn’t dry on the clean lower panels.
Safe Cleaning Solutions and Chemical Interactions
You do not need harsh industrial chemicals to clean vinyl. In fact, many common household cleaners can damage the PVC or cause discoloration. A simple mixture of 70% water and 30% white vinegar is an excellent organic solution for killing mold spores without harming your landscaping.
For more stubborn stains, a mixture of one gallon of water, 1/3 cup of laundry detergent, and 2/3 cup of trisodium phosphate (TSP) is highly effective. However, you must be cautious with TSP, as it can be caustic to skin and eyes. Always wear protective gear and cover sensitive plants near the foundation of your home before applying any chemical wash.
Avoid cleaners containing organic solvents, undiluted chlorine bleach, or abrasive powders. These can strip the protective UV coating from the siding, leading to “chalking,” where the color begins to rub off as a fine white powder. Once the protective layer is gone, the siding becomes much more susceptible to fading and brittleness.
Addressing Mold, Mildew, and Algae Growth
Biological growth is a common issue, particularly on the north side of the house or in areas shaded by heavy foliage. Mold and algae thrive in damp, dark environments. If you notice green or black spots appearing on your planks, it is a sign that moisture is lingering on the surface for too long.
Inclusion of mold removal in your vinyl siding maintenance checklist is non-negotiable for those in humid climates. Beyond aesthetics, mold can cause respiratory issues for residents if the spores enter the HVAC system. To treat these areas, use an oxygen-based bleach solution rather than a chlorine-based one. Oxygen bleach is safer for the environment and more effective at killing the “roots” of the mold.
Furthermore, consider trimming back bushes and trees that are within three feet of your home. This increases airflow and allows sunlight to hit the siding, naturally inhibiting the growth of biological organisms. Proper landscaping is a passive but powerful component of exterior maintenance.
The Physics of Thermal Expansion and Contraction
One of the most unique aspects of vinyl maintenance is managing its physical movement. A standard 12-foot vinyl panel can expand or contract by as much as half an inch depending on the temperature. This is why installers leave a gap at the ends of the panels where they meet the J-channel or corner posts.
During your vinyl siding maintenance checklist walkthrough, check for “waving” or “rippling” in the panels. This usually indicates that the siding was nailed too tightly. If the nail head is driven flush against the siding, the panel cannot slide as it expands in the heat, causing it to bow outward. This is more than a cosmetic issue; bowed panels create gaps that allow wind-driven rain to enter the wall cavity.
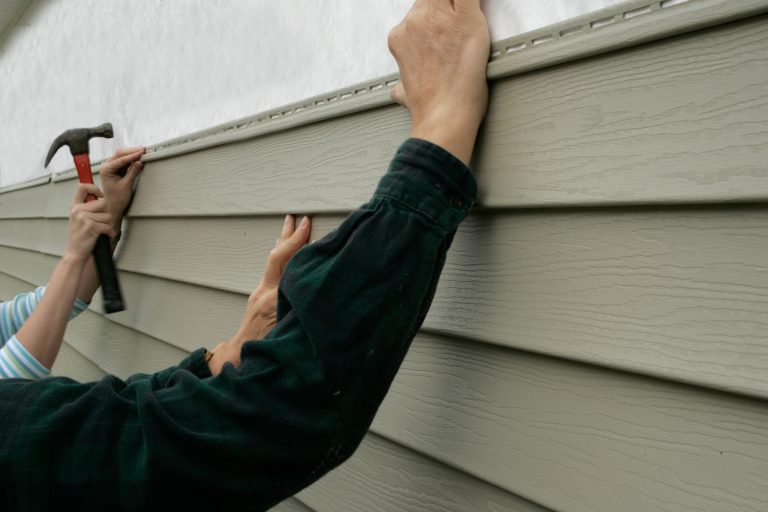
Repairing this involves using a zip tool to unhook the affected panel and the one above it. You can then pull the nails slightly or re-center them in the nailing slots. This allows the siding to “float” again, restoring its flat appearance and functional integrity.
Inspecting for Pest Infestations
Vinyl itself is not a food source for insects, which gives it an advantage over wood siding. However, the space behind the vinyl can provide a perfect sanctuary for various pests. Termites, carpenter ants, and wasps often take advantage of gaps in the siding to build nests or gain access to the wooden sheathing beneath.
When performing your vinyl siding maintenance checklist, look for “frass” (insect droppings) or small piles of sawdust at the base of your walls. Also, pay attention to any localized areas where wasps seem to be entering or exiting behind a panel. If you suspect an infestation, it is critical to address it before the structural wood of your home is compromised.
Mice and rats can also exploit small openings where the siding meets the foundation. Ensure that the “starter strip” at the bottom of the installation is secure and that there are no gaps larger than a quarter-inch. Sealing these entry points with stainless steel mesh or specialized sealants can prevent a minor nuisance from becoming a full-blown infestation.
Repairing Minor Damage: Cracks and Holes
Life happens, and sometimes your siding takes a hit. Whether it’s from a lawnmower throwing a rock or a stray hailstone, small cracks and holes are inevitable. These openings are gateways for moisture and should be repaired immediately to prevent rot in the underlying OSB or plywood sheathing.
For small holes (less than the size of a dime), you can use a high-quality, exterior-grade vinyl caulk that matches your siding color. Clean the area thoroughly, apply the caulk, and smooth it over with a putty knife. This creates a watertight seal that will last for several years.
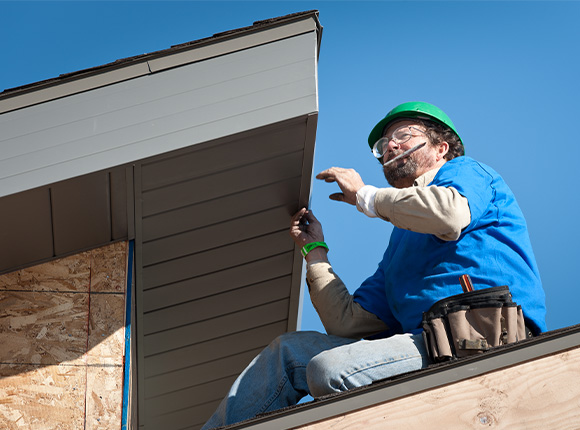
For larger cracks or holes, the best approach is to replace the entire panel. Because of the interlocking nature of vinyl, this is a relatively simple DIY project. Use a zip tool to unhook the damaged panel, remove the nails, and slide in a new piece. Note that the new panel may have a slightly different color due to the “fading” of the older siding, so you might consider taking a panel from an inconspicuous area of the house to use for the repair and putting the new, slightly off-color panel in the hidden spot.
Maintaining Accessories: Trim, J-Channel, and Soffit
While the large flat panels of siding take up the most surface area, the accessories are where most water intrusion occurs. The J-channel (the trim around windows and doors) and the corner posts are designed to direct water away from the openings. If these components are cracked or improperly sealed, water can seep into the window frames.
Your vinyl siding maintenance checklist must include a close inspection of all “penetrations” through the siding. This includes outdoor faucets, dryer vents, and electrical outlets. Check the caulking around these areas. Over time, caulk becomes brittle and shrinks, leaving gaps. Removing the old caulk and applying a fresh bead of silicone-based sealant is a simple way to prevent thousands of dollars in water damage.
Additionally, check the soffit—the material under the eaves of your roof. The soffit provides vital ventilation for your attic. If the vents are clogged with dust or painted over, your attic will overheat, leading to ice dams in the winter and premature shingle failure in the summer. Use a vacuum or compressed air to keep these vents clear.
Environmental Factors: UV Exposure and Oxidation
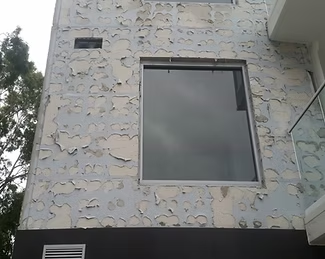
If you live in a high-UV environment like the American Southwest, your vinyl siding faces a constant bombardment of solar radiation. This leads to oxidation, a chemical process where the top layer of the PVC breaks down. You can identify oxidation by rubbing your hand across the siding; if a chalky white residue comes off on your skin, the siding is oxidizing.
While oxidation is a natural part of the aging process, it can be managed. Regular cleaning removes the chalky layer, which prevents it from running down and staining your windows or foundation. Some specialized “vinyl restorers” can be applied to bring back some of the luster, but these are often temporary fixes.
If the oxidation is severe enough that the color of the siding has changed significantly, or if the material feels “crispy” to the touch, the UV stabilizers have likely failed. At this point, the siding is no longer providing optimal protection, and you should begin planning for a replacement in the near future.
When Maintenance Isn’t Enough: Signs You Need Replacement
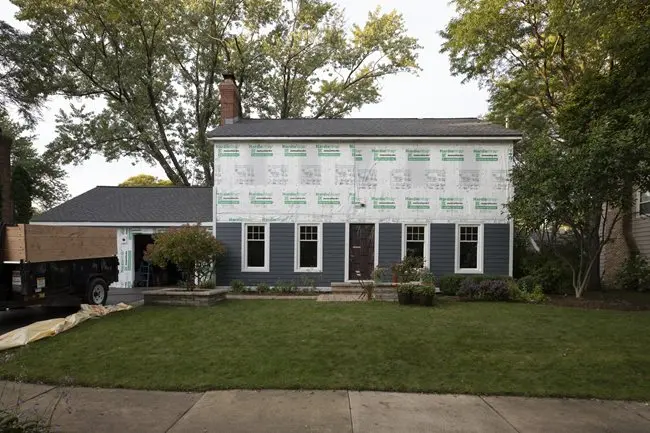
No matter how diligent you are with your vinyl siding maintenance checklist, every material has a finite lifespan. Typically, high-quality vinyl lasts between 20 and 40 years. However, various factors can shorten this timeframe. Knowing when to stop repairing and when to start replacing is key to managing your home’s “cost of ownership.”
The most obvious sign that you need a replacement is widespread warping or “oil canning.” This is when the panels look wavy even when the temperature is moderate. This often indicates that the siding has been heat-damaged—sometimes by the reflection of the sun off of high-efficiency windows on a neighboring house (a phenomenon known as solar reflection damage).
Another critical sign is the presence of moisture or mold inside your home. If you notice peeling paint, wallpaper, or mold on the interior of your exterior walls, the siding has failed in its primary job of keeping water out. At this stage, you likely have rot in the sheathing and insulation, and a full tear-off and replacement is necessary to save the structure.
The ROI of Siding Replacement
While replacement is a significant investment, it is one of the highest-returning home improvement projects. According to the “Cost vs. Value” report by Remodeling Magazine, homeowners often recoup 75-80% of the cost of vinyl siding replacement upon the sale of the home. This is due to the immediate “curb appeal” boost and the buyer’s confidence in a well-maintained exterior.
Newer vinyl siding products also offer significantly better insulation than older versions. “Insulated vinyl siding” features a layer of rigid foam backing that increases the R-value of your walls, potentially lowering your energy bills. When you transition from a maintenance phase to a replacement phase, these energy savings should be factored into your budget.
The Impact of Landscaping on Siding Health
Many homeowners overlook the relationship between their garden and their siding. Plants that touch the siding can trap moisture, scrape the finish during windstorms, and provide a bridge for ants and termites. As part of a holistic vinyl siding maintenance checklist, you should maintain a “buffer zone” between your plants and your home.
Mulch is another factor to consider. If mulch is piled too high against the foundation, it can cover the bottom edge of the siding and the weep holes. This traps moisture against the wooden sill plate of your home, which is a recipe for catastrophic rot. Ensure there is at least a 6-inch gap between the bottom of your siding and the top of your mulch or soil.
Furthermore, be careful when using string trimmers (weed whackers) near the base of your house. The high-speed line can easily slice through vinyl, leaving jagged holes that are difficult to patch. Installing a stone border or a “no-grow” zone around the perimeter of the house can protect the siding from mechanical damage during lawn care.
Professional vs. DIY Maintenance
Most tasks on a vinyl siding maintenance checklist can be performed by the average homeowner with a ladder and a garden hose. However, there are times when calling in a professional is the wiser choice. If your home is more than two stories tall, the safety risks of ladder work significantly increase.
Professional siding cleaners use specialized “soft wash” systems that utilize low pressure and high-volume water mixed with industrial-grade, biodegradable surfactants. This is often more effective at killing deep-seated mold spores than a simple DIY vinegar wash. They also have the experience to spot subtle signs of failure that a homeowner might miss, such as failing flashing around a chimney.
If you decide to hire a pro, ensure they are insured and that they specifically offer “low-pressure” cleaning. Avoid companies that only use high-pressure washers, as they can cause more harm than good to a vinyl exterior. A professional inspection once every five years is a good supplement to your own biannual checks.
Seasonal Considerations for Vinyl Care
Maintenance needs shift with the seasons. In the winter, the primary concern is impact damage. Because PVC becomes brittle in the cold, it is much easier to crack a panel if you hit it with a snow shovel or if a heavy icicle falls from the roof. During the winter, avoid leaning heavy objects against the siding.
In the spring, the focus shifts to pollen and organic growth. This is the best time for a deep clean to remove the winter’s grime. In the summer, keep an eye on “melting” siding if you have a grill or fire pit. Radiant heat from a BBQ can warp vinyl from several feet away. Always keep heat sources at least 10 feet from your siding.
Fall is the time for a thorough “waterproofing” check. As the rainy season approaches, ensuring that your gutters are clear is the most important siding maintenance task you can do. Overflowing gutters dump massive amounts of water directly behind the siding trim, which is where most leaks begin.
The Financial Benefits of Documentation
Maintaining your home is a physical task, but documenting it is a financial one. Keep a log of every time you perform your vinyl siding maintenance checklist. Take photos of the siding after its annual wash and keep receipts for any repairs or professional cleanings.
When it comes time to sell your home, this “maintenance log” is a powerful tool. It proves to potential buyers and home inspectors that the property has been meticulously cared for. This transparency can reduce “negotiation friction” and help you command a higher asking price. It also helps in insurance claims; if your siding is damaged by a storm, having proof of its prior good condition can expedite your claim.
Moreover, many siding warranties require proof of regular maintenance to remain valid. If a product fails prematurely, the manufacturer may ask for evidence that the siding wasn’t neglected or cleaned with unapproved chemicals. Your documentation protects your warranty rights.
Conclusion: The Long-Term Value of Diligence
Vinyl siding is a remarkable building material that offers a balance of durability, cost-effectiveness, and aesthetic variety. However, its “low maintenance” label should not lull homeowners into a state of complacency. By adhering to a rigorous vinyl siding maintenance checklist, you are doing more than just washing walls; you are preserving the skeletal structure of your home and ensuring its longevity for the next generation.
Whether you are scrubbing away a bit of spring pollen or carefully unhooking a panel to fix a thermal expansion issue, these small acts of stewardship pay massive dividends. A well-maintained home is a safer, more efficient, and more valuable asset. By understanding the chemistry, physics, and practical needs of your vinyl exterior, you can face the changing seasons with confidence, knowing your home is prepared for whatever the environment throws its way.
Ultimately, the transition from maintenance to replacement is a natural part of homeownership. By staying diligent with your inspections, you will know exactly when that time has come, allowing you to make an informed, stress-free decision about your home’s next exterior transformation. Until then, keep your brushes ready and your eyes sharp; your siding will thank you for it.