15 Essential Steps for DIY Siding Installation: A Complete Professional Guide
Embarking on a home improvement journey of this magnitude requires a blend of physical stamina and technical precision. Replacing your home’s exterior is not merely an aesthetic choice but a critical structural upgrade that protects your investment from the elements. By understanding the foundational Steps for DIY siding installation, homeowners can save thousands of dollars in labor costs while ensuring their property remains weather-tight and energy-efficient for decades to come.

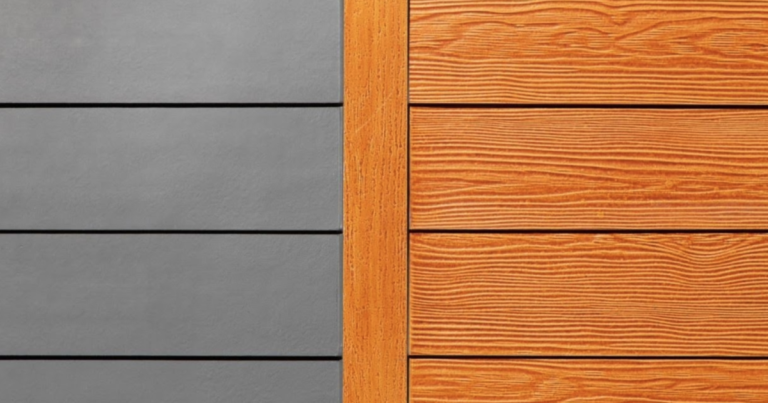
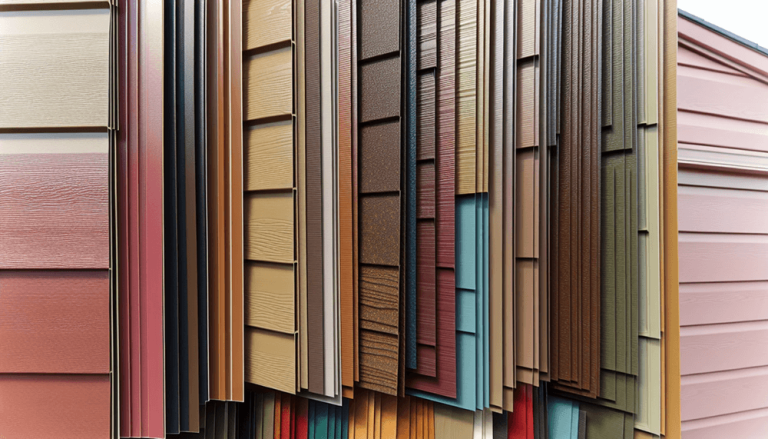
Vinyl siding remains the most popular choice for North American homeowners due to its durability, low maintenance, and relative ease of installation. However, the simplicity of the material is deceptive; the success of the project relies heavily on the preparation of the substrate and the mechanical understanding of thermal expansion. In the following sections, we will dissect every nuance of the process, from initial measurements to the final trim pieces.
Before you drive the first nail, you must recognize that siding is a “water-shedding” system, not a “water-proof” system. Moisture will inevitably find its way behind the panels, which is why the underlying house wrap and flashing are just as important as the siding itself. Transitioning from an old, drafty exterior to a modern, high-performance facade requires a methodical approach that prioritizes long-term moisture management over rapid completion.
The Financial and Structural Preparation
The first phase of any successful exterior renovation involves a rigorous audit of your current structure and your project budget. You must determine if your existing sheathing is structurally sound enough to hold new fasteners. If the wood beneath your old siding is rotted or soft, the new installation will fail prematurely, regardless of how well you follow the manufacturer’s instructions.
Furthermore, local building codes often dictate specific requirements for moisture barriers and insulation values. Contacting your local building department is a mandatory step to ensure your project complies with regional standards. Ignoring these regulations can lead to significant fines or complications when you eventually decide to sell your home.
Budgeting for this project should include a 15% contingency fund to cover unforeseen repairs. Once the old siding is removed, you may discover insect damage, mold, or structural issues that were previously hidden. Being financially prepared for these “surprises” prevents the project from stalling mid-way through, leaving your home exposed to the weather.
Accurate Measuring and Material Estimation
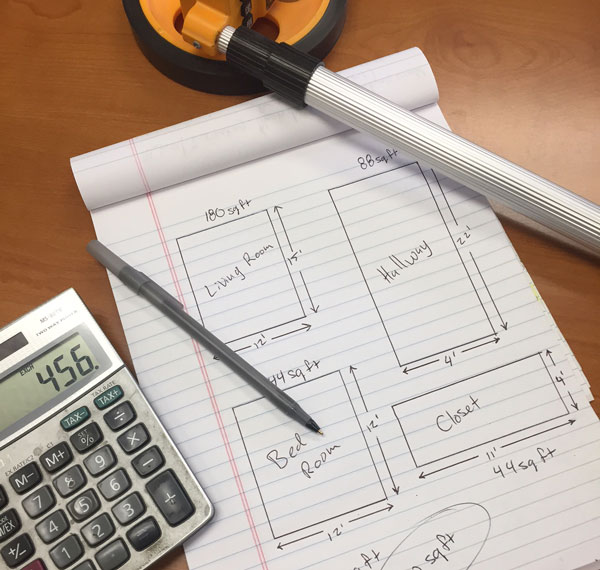
Ordering the correct amount of material is a science that requires precision to avoid excessive waste or multiple trips to the supplier. To calculate the total surface area, break each wall of your home into simple geometric shapes—rectangles and triangles. Measure the height and width of each section and multiply them to find the square footage.
Subtract the area of large openings like windows and doors, but do not be too aggressive with these deductions. It is standard practice to add a 10% waste factor to your total square footage to account for cuts and overlaps. If your home has complex architecture with many gables and corners, consider increasing this waste factor to 15%.
In addition to the main siding panels, you will need a variety of accessory pieces. These include starter strips, J-channels, undersill trim, corner posts, and soffit panels. Mapping out these components on a diagram of your house will help you create a comprehensive shopping list that ensures you have every trim piece necessary for a professional finish.
| Essential Tool Category | Specific Tools Required | Primary Purpose in Siding Installation |
|---|---|---|
| Cutting Tools | Tin snips, utility knife, power saw with fine-tooth blade | Trimming panels to size and making intricate cutouts around obstacles. |
| Specialized Siding Tools | Snap lock punch, slot punch, zip tool (siding removal tool) | Creating locking tabs, extending nail slots, and unlocking panels. |
| Layout & Leveling | Chalk line, 4-foot level, laser level, tape measure | Ensuring the starter strip and all subsequent courses are perfectly horizontal. |
| Fastening Tools | Hammer or pneumatic siding nailer, galvanized roofing nails | Securing panels and trim to the wall sheathing without over-tightening. |
Steps for DIY siding installation
The core of the project begins with the systematic execution of the Steps for DIY siding installation. This process starts with the removal of the old material, which must be done carefully to avoid damaging the underlying structure. Use a pry bar to gently lift the old panels, taking care to remove all old nails that could interfere with the new installation.
Once the walls are stripped, inspect the sheathing for any signs of water intrusion or rot. Replace any damaged plywood or OSB sections immediately. This is also the ideal time to upgrade your home’s insulation by adding rigid foam board or ensuring the existing house wrap is in pristine condition. All seams in the house wrap should be sealed with specialized construction tape.
The next critical move is establishing a perfectly level baseline. Using a chalk line and a level, mark the height for your starter strip around the entire perimeter of the house. If this baseline is even slightly tilted, the error will compound as you move up the wall, resulting in crooked siding that is visible from the street. Precision at this stage is non-negotiable.
Understanding the Mechanics of Thermal Expansion
Vinyl siding is unique because it is designed to “float” on the wall rather than being fixed rigidly in place. PVC panels expand and contract significantly as temperatures change. A 12-foot panel can change in length by up to 1/2 inch or more between a cold winter morning and a hot summer afternoon.
To accommodate this movement, you must never drive nails tight against the siding. Instead, leave a gap of approximately 1/32 of an inch (about the thickness of a fingernail) between the nail head and the siding. The panel should be able to slide back and forth easily after it has been nailed to the wall.
In addition to the nail gap, you must leave room at the ends of the panels where they meet corner posts or J-channels. During temperate weather, a 1/4 inch gap is standard. If you are installing in freezing temperatures, increase this gap to 3/8 of an inch to allow for the significant expansion that will occur during the summer months.
Installing Corner Posts and Trim Accessories
Before the first siding panel is hung, all “receiver” channels must be in place. This includes the outside and inside corner posts, as well as J-channels around windows and doors. Corner posts should extend approximately 1/4 inch below the bottom of the starter strip to allow for drainage and proper coverage.
When fastening corner posts, place the first nail at the very top of the uppermost nail slot. This allows the post to hang from that nail, while all subsequent nails should be placed in the center of the slots. This technique ensures that the post expands downward, preventing it from buckling or warping at the top.
J-channels serve as the finishing edge for siding panels where they meet windows, doors, or the roofline. When installing J-channels around windows, use a “miter cut” technique to create a clean, professional look. Ensure that the top J-channel (the header) overlaps the side channels to direct water away from the window frame.
The Art of the Starter Strip
The starter strip is the most important piece of hardware you will install. It provides the locking mechanism for the very first course of siding. Position the starter strip along the chalk line you previously snapped, ensuring it is at least 8 to 10 inches above the ground to prevent moisture wicking and pest access.
Leave a 1/4 inch gap between sections of the starter strip to allow for expansion. Fasten the strip every 8 to 12 inches into the wall studs or solid sheathing. If the foundation is uneven, you may need to use “shims” behind the starter strip to maintain a straight line across the wall.
Once the starter strip is secure, double-check it for level one last time. If it is off by even an eighth of an inch, your entire house will look tilted. Following the correct Steps for DIY siding installation means being willing to redo a section if it isn’t perfect, as errors in the foundation of the project are impossible to hide later.
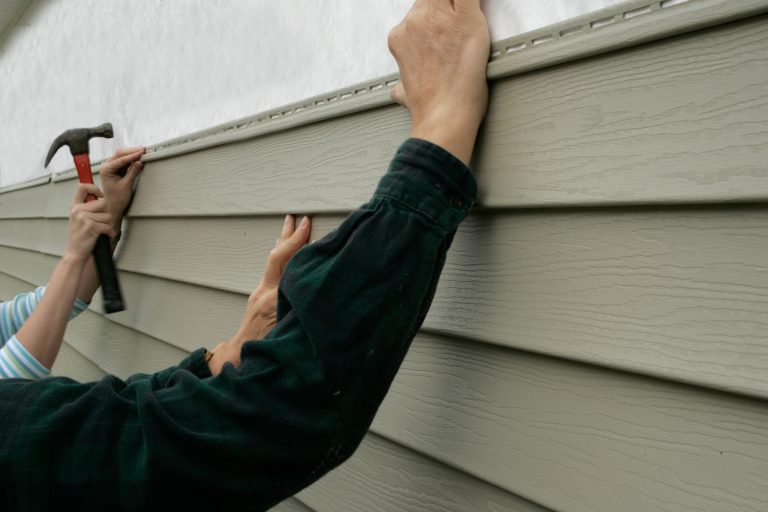
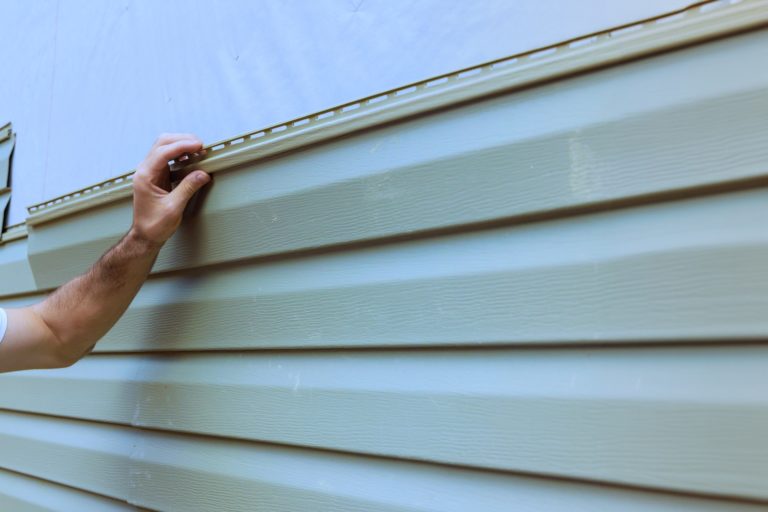
Executing the Main Course Installation
With the trim and starter strip in place, you can begin hanging the siding panels. Hook the bottom of the first panel into the starter strip and pull upward until you feel the lock engage. Do not pull the panel too tight; it should feel “snug” but not under extreme tension. This allows the panel to maintain its profile without distorting.
Work from the back of the house toward the front. This ensures that the panel overlaps face away from the street, making the seams less noticeable to passersby. Each panel should overlap the previous one by about 1 to 1-1/4 inches. Avoid lining up seams vertically; instead, stagger them at least 3 feet apart to create a more natural appearance.
Check for level every three or four courses. Even if your starter strip was perfect, panels can “creep” up or down as you nail them. Use your 4-foot level to verify that the courses remain horizontal. If you find a slight deviation, you can make minor adjustments over the next few courses to bring the siding back into alignment.
Cutting and Fitting Around Obstacles
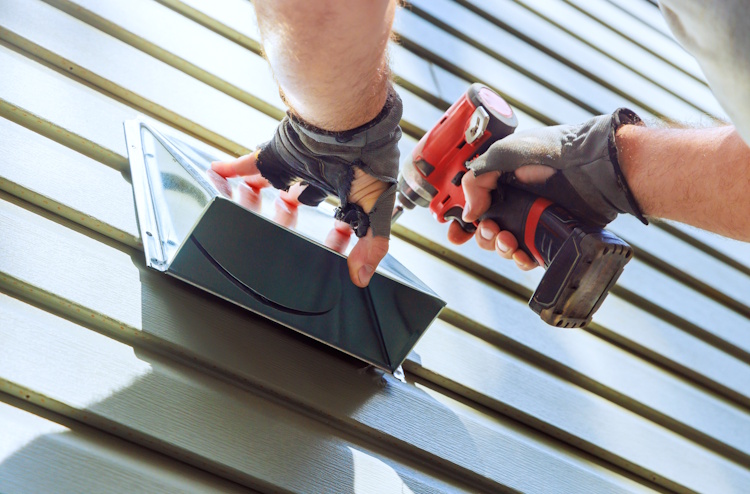
Inevitably, you will encounter exterior outlets, dryer vents, and hose bibs. These require precise cutouts to maintain a professional look and a weather-tight seal. Use your tin snips to cut the siding to fit around these objects, leaving the required 1/4 inch gap for expansion.
For a truly professional finish, use specialized “siding blocks” or “mounting blocks” for these penetrations. These blocks provide a flat surface for the outlet or vent to sit on and have built-in J-channels to receive the siding. This eliminates the need for messy caulking and provides a much cleaner aesthetic.
When cutting panels to length, a circular saw with a fine-tooth blade installed backward works exceptionally well for clean, burr-free edges. However, always wear eye protection, as this method can send small plastic shards flying. For smaller, intricate cuts around moldings, a pair of aviation snips provides the best control.
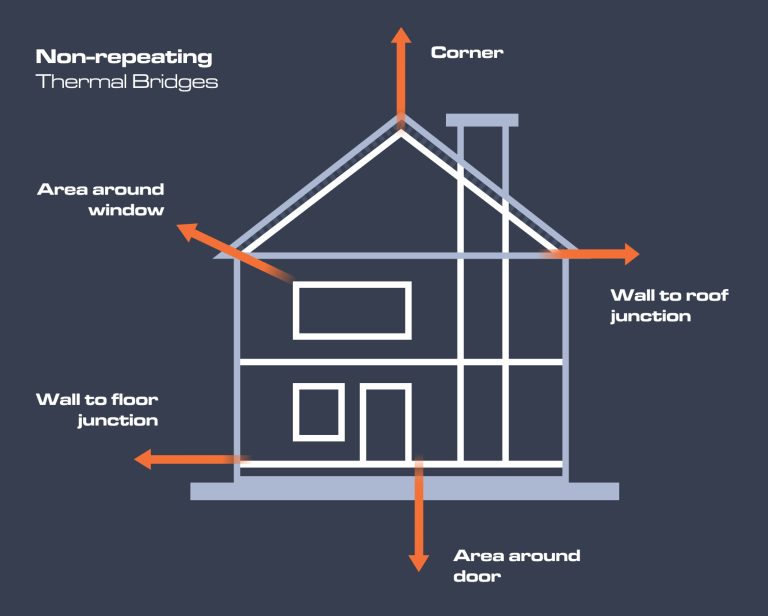
Handling Window and Door Transitions
The area around windows and doors is the most common site for leaks. To prevent this, install a “drip cap” over the top of the window casing before the J-channel goes on. This metal flashing directs water out and over the face of the siding rather than allowing it to seep behind the window frame.
When the siding reaches the bottom of a window, you will likely need to cut a “notch” out of the panel. Use your snap-lock punch to create tabs along the cut edge of the siding. These tabs will lock into the undersill trim (also known as finish trim) that you have installed under the window sill.
This same process applies to the top of the window. The goal is to ensure that the cut edges of the siding are always hidden by a trim piece and securely locked so they cannot rattle in the wind. Proper execution of these Steps for DIY siding installation around openings is what separates a DIY job from a professional-grade renovation.
Working with Gables and Rake Walls
Installing siding on gable ends presents unique challenges due to the angled cuts required to match the roofline. To determine the correct angle, use a T-bevel or two pieces of scrap siding to mimic the pitch of the roof. This “template” will allow you to mark the correct angle on every panel you install in the gable.
Just like with the rest of the house, you must leave a gap between the end of the siding panels and the J-channel along the rake board. Because gables are often high and exposed to significant wind, ensure that every panel is properly locked. If a panel is too short to reach two studs, use a small amount of high-quality sealant in the lock to provide extra stability.
For the very top piece of the gable—the small triangle at the peak—you may not have enough room to use the standard nailing hem. In this specific instance, you can use a color-matched trim nail to face-nail the piece through a pre-drilled hole. This is one of the few places where “pinning” the siding is acceptable, as the piece is too small to expand significantly.
Soffit and Fascia Integration
While often treated as a separate project, installing new soffit and fascia is the logical conclusion to a siding job. Soffit panels provide vital ventilation to your attic, preventing heat buildup and ice damming. Ensure that the vent holes in the soffit are not blocked by old wood or insulation.
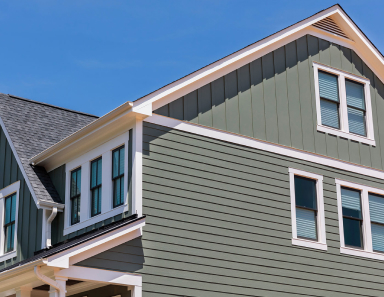
Fascia covers the wooden boards at the edge of your roofline. Aluminum fascia is the standard choice, as it can be custom-bent to fit your specific home. Slide the top edge of the fascia under the roof drip edge and secure it to the bottom of the fascia board using color-matched trim nails. Avoid over-nailing, which can cause the aluminum to “oil can” or ripple.
The transition between the siding wall and the soffit is handled by a F-channel or a J-channel. This creates a clean “pocket” for the soffit panels to sit in. By coordinating the colors of your siding, trim, and soffit, you create a cohesive and high-end look for your home’s exterior.
The Final Course and Finishing Touches
The final course of siding at the top of the wall (under the eaves) requires a special technique. Because you usually have to rip the panel to width, the factory nailing hem is removed. This is where the undersill trim (finish trim) becomes essential once again.
Install the undersill trim level against the top of the wall. Measure the distance from the lock of the previous course to the inside of the undersill trim and subtract 1/4 inch. Cut your siding panel to this width. Then, use your snap-lock punch to create tabs every 6 inches along the cut edge of the panel.
Push the panel into the undersill trim until the tabs “snap” into place. This creates a secure, nail-free finish that allows for expansion along the entire length of the wall. This refined approach to the Steps for DIY siding installation ensures that the top course won’t blow off during a storm or buckle in the sun.
Sealants and Final Inspection
While vinyl siding is designed to be caulk-free in most areas, certain junctions require a high-quality sealant. Use a silicone-based or polymer sealant that matches your siding color for gaps around utility penetrations or where siding meets dissimilar materials like brick or stone. Avoid using cheap latex caulk, which will crack and peel within a few years.
Walk around the entire house and perform a “pull test” on various panels. They should feel secure in their locks but should still be able to slide horizontally if you push them with your hand. If a panel is “stuck,” find the nail that is too tight and loosen it. This small step prevents the siding from warping when the weather turns hot.
Finally, clean any scuffs or pencil marks using a soft cloth and a mild detergent. Inspect the ground for fallen nails; using a magnetic sweeper is highly recommended to protect tires and lawnmowers. A clean job site is the hallmark of a professional-grade DIY installation.
Common Pitfalls and How to Avoid Them
The most frequent mistake in DIY siding is “hard-nailing.” Homeowners often feel the need to drive the nails flush against the siding to make it feel “sturdy.” This is a recipe for disaster. When the sun hits hard-nailed siding, the panels have nowhere to go and will buckle, creating permanent waves in your walls.
Another common error is failing to overlap the panels correctly. If the overlap is too short (less than an inch), the panels can pull apart when they contract in the winter, exposing the house wrap. Conversely, if the overlap is too deep, it can restrict movement. Stick to the manufacturer’s 1-1/4 inch recommendation for the best results.
Lastly, ignore the “pull up” instinct. When hooking a panel into the one below, do not pull it upward with all your might. This stretches the vinyl and thins out the profile, making it more susceptible to impact damage. Simply engage the lock and let the panel hang naturally before you begin nailing.
Environmental and Safety Considerations
Siding your home involves working at significant heights. Always use stable ladders or, preferably, pump-jack scaffolding for a safer and more efficient work platform. Never work alone when using extension ladders, and always be mindful of overhead power lines when moving long pieces of siding or trim.
In terms of waste management, vinyl siding is recyclable in many areas. Rather than sending your scraps to a landfill, check with local recycling centers to see if they accept PVC. Properly disposing of old lead-based paint siding (if your home is older) requires specific containment procedures to avoid soil contamination.
By following these Steps for DIY siding installation, you are not just changing the color of your home; you are reinforcing its primary defense against nature. The precision you apply today will pay dividends in the form of lower energy bills, increased curb appeal, and the satisfaction of knowing the job was done to the highest possible standard.