Vinyl Siding Replacement Guide: The Ultimate 2024 Installation & Cost Manual
The exterior of a home serves as its primary defense against the elements and its most prominent aesthetic feature. Over time, even the most durable materials begin to succumb to the relentless pressure of UV radiation, moisture, and temperature fluctuations. Transitioning to a new exterior solution is often a necessity rather than a choice. This comprehensive vinyl siding replacement guide is designed to help you navigate the complexities of modern cladding, ensuring your home remains protected and visually appealing for decades.
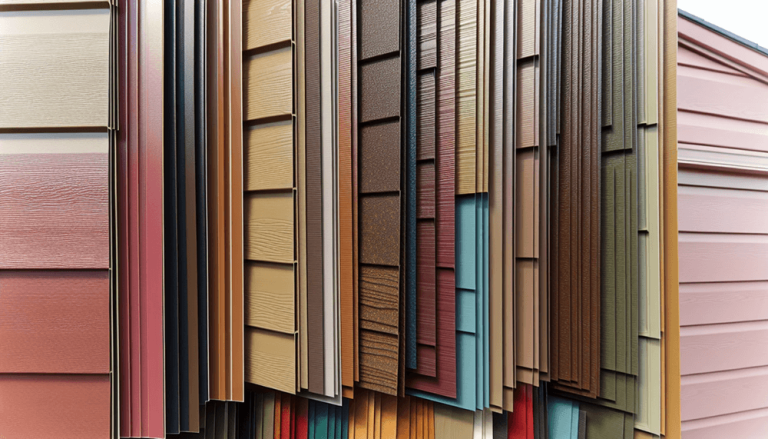
Homeowners often feel overwhelmed by the sheer volume of choices available in today’s market. From various profiles and textures to an endless array of colors, the selection process can be daunting. However, understanding the technical specifications and installation requirements can simplify the journey. By following this detailed breakdown, you will gain the confidence to manage a full-scale renovation project effectively.
Vinyl has evolved significantly since its introduction in the mid-20th century. Modern formulations are engineered with advanced polymers and UV inhibitors that prevent the brittle failure common in older products. Furthermore, the integration of insulation backings has transformed vinyl from a simple aesthetic cover into a high-performance thermal barrier. This guide will explore every facet of the replacement process, from initial inspection to final cleanup.
Recognizing the Signs of Siding Deterioration
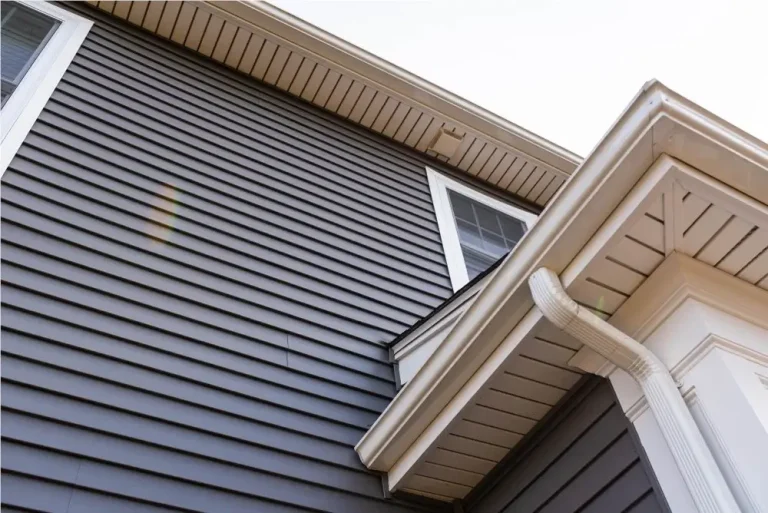
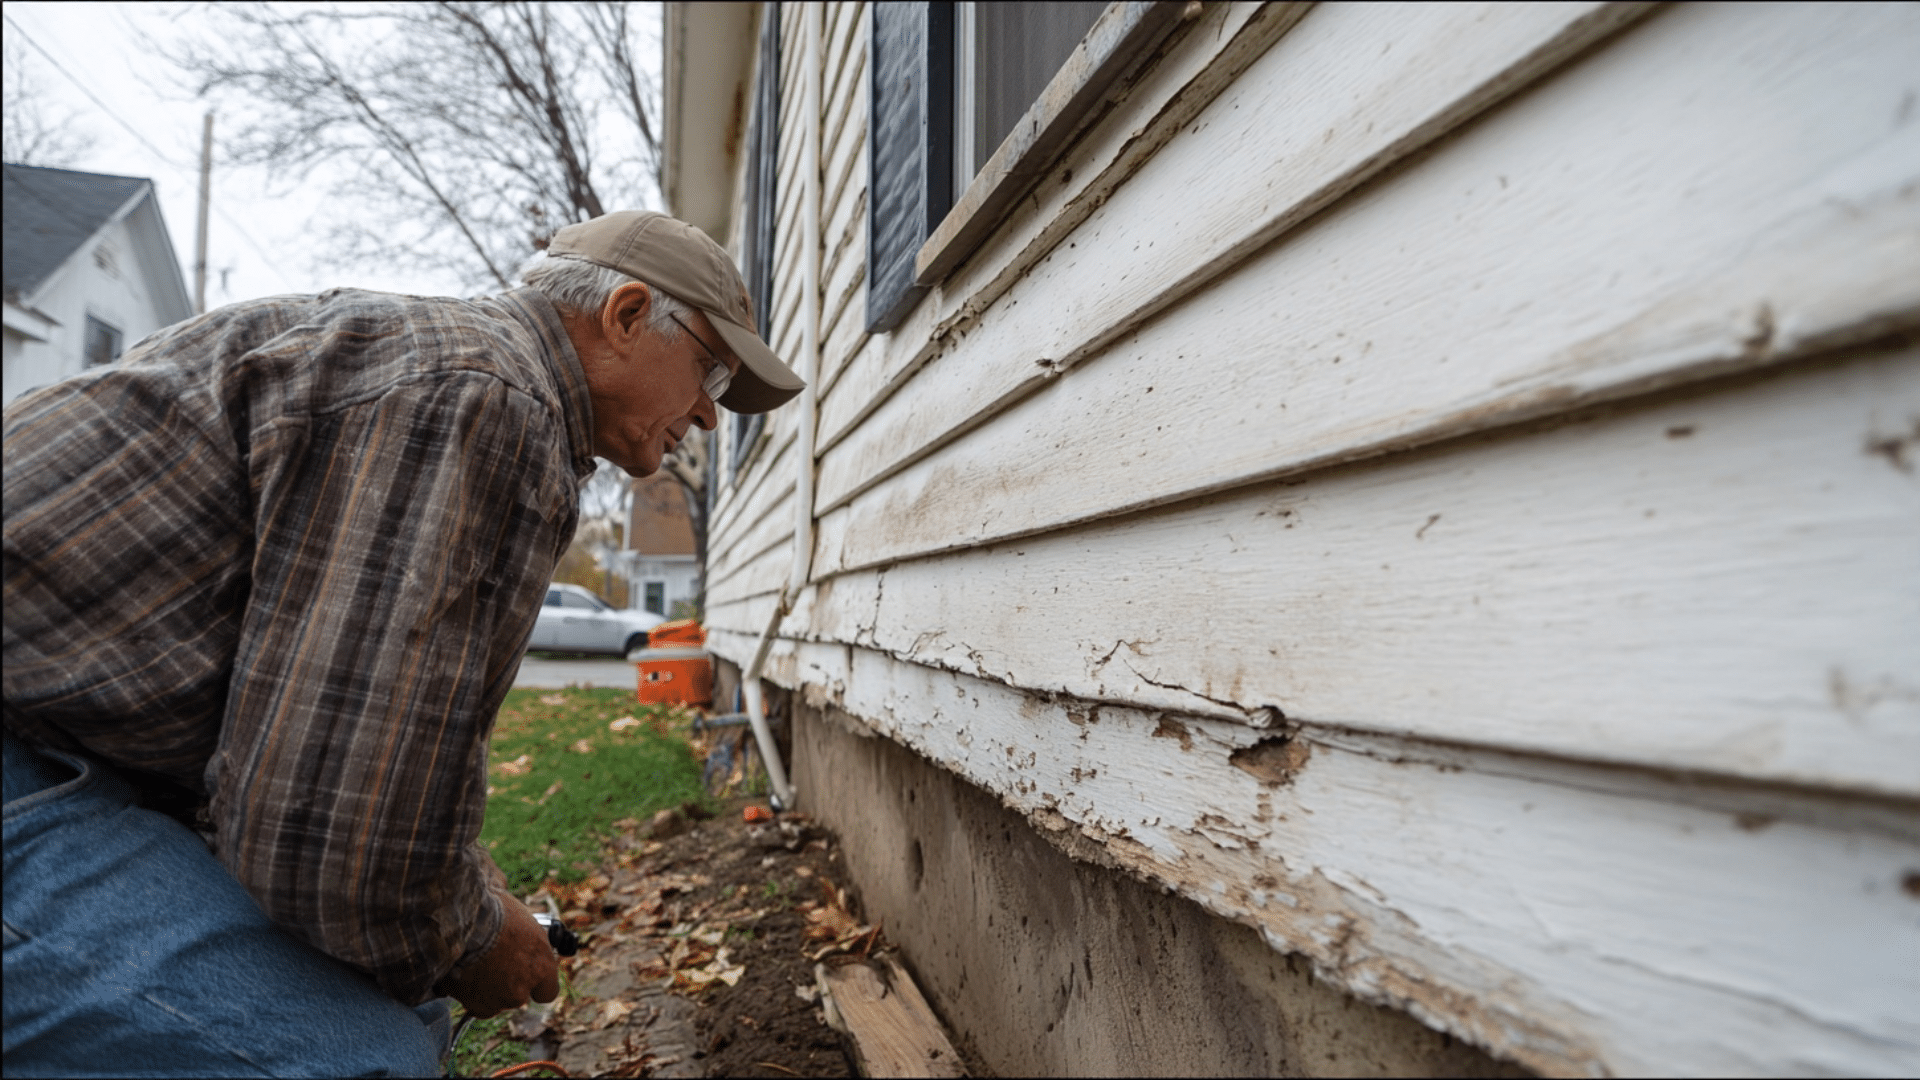
Before committing to a full replacement, it is crucial to conduct a thorough audit of your current exterior. Often, the damage is more than skin deep, affecting the underlying structural integrity of the house. Look for signs of “chalking,” which occurs when the finish of the vinyl breaks down into a fine white powder. This indicates that the protective layer has eroded, leaving the material vulnerable to further degradation.

Warping and buckling are other common symptoms of failure, often caused by improper initial installation or extreme heat. When panels can no longer expand and contract freely, they distort, creating gaps where moisture can penetrate. If you notice a sudden spike in your energy bills, it may be due to air infiltration behind failing panels. In addition, localized rot on the wooden sheathing beneath the siding is a clear signal that the moisture barrier has been compromised.
Biological growth, such as mold, mildew, or fungus, should never be ignored. While surface mold can sometimes be cleaned, persistent growth often suggests that water is trapped behind the siding. This trapped moisture can eventually lead to interior drywall damage and compromised indoor air quality. Consequently, identifying these issues early can prevent more expensive structural repairs down the road.
The Economics of Vinyl Siding Replacement
Budgeting for a siding project requires a nuanced understanding of both material and labor costs. On average, homeowners can expect to spend a significant amount, but the return on investment (ROI) is historically high. Vinyl remains one of the most cost-effective cladding options compared to fiber cement, wood, or brick. However, the total price is influenced by the “square” count of your home, where one square equals 100 square feet of surface area.
Labor typically accounts for a substantial portion of the total invoice. Professionals must account for the removal and disposal of old materials, site preparation, and the intricate work around windows and doors. Furthermore, geographic location plays a role, as labor rates vary significantly between rural and urban centers. It is also wise to set aside a contingency fund of 10% to 20% for unforeseen issues like hidden rot or pest damage.
Material quality also dictates the final price point. Standard grade vinyl is the most affordable, but premium grades offer better impact resistance and color retention. Insulated vinyl, while more expensive upfront, provides long-term savings through improved energy efficiency. When calculating your budget, consider the long-term maintenance savings that come with higher-quality products.
Vinyl Siding Replacement Guide: Planning and Selection
As a foundational vinyl siding replacement guide, this section focuses on the critical decision-making phase. Selecting the right profile is essential for achieving the desired architectural style. Traditional lap siding offers a classic look, while Dutch lap provides deeper shadow lines for added texture. For those seeking a rustic aesthetic, vinyl cedar shakes offer the look of wood without the high maintenance requirements.
Color selection is more than just a matter of personal taste. Lighter colors tend to reflect more sunlight, which can help keep the home cooler in summer and reduce the risk of thermal distortion. Conversely, darker colors are increasingly popular for modern designs but require premium formulations to resist fading. Many manufacturers now offer “cool-roof” technology for siding, using pigments that reflect infrared light even in dark hues.
Thickness is a primary indicator of quality and durability. Professional-grade vinyl typically ranges from 0.040 to 0.048 inches in thickness. Thicker panels are generally more rigid, hang straighter, and offer better resistance to hail and wind-blown debris. When reviewing samples, pay attention to the locking mechanism at the top of the panel, as a secure lock is vital for wind resistance during storms.
Comparing Vinyl Grades and Performance
Not all vinyl is created equal, and understanding the tiers of quality is vital. Economy grade is often thin and susceptible to damage, making it a poor choice for long-term residency. Standard grade is the industry baseline, offering a balance of affordability and performance. This grade is suitable for most residential applications where extreme weather is not a constant threat.
Premium and Super-Premium grades feature enhanced chemical stabilizers and thicker profiles. These products often come with longer warranties and more realistic wood-grain textures. Furthermore, some high-end lines include reinforced nail hems, which provide superior holding power in high-wind zones. Investing in these higher tiers often results in a more professional finish and less maintenance over the life of the product.
The Role of Insulated Vinyl Siding
Insulated siding features a layer of rigid foam backing, usually expanded polystyrene (EPS), bonded to the vinyl panel. This adds structural rigidity, making the siding feel more substantial and less like plastic. More importantly, it provides a continuous layer of insulation over the home’s studs, which reduces “thermal bridging.” This process prevents heat from escaping through the wooden frame of the house.
In addition to energy savings, insulated siding improves the acoustic performance of the home. The foam layer acts as a sound dampener, reducing the intrusion of street noise and sirens. While the initial investment is higher, the increased R-value and improved comfort levels make it a popular choice for homeowners in extreme climates. Many utility companies also offer rebates for installing energy-efficient cladding.
Essential Tools and Safety Equipment
If you are considering a DIY approach or simply want to monitor a contractor’s work, knowing the tools is essential. A specialized “zip tool” is a small but mighty instrument used to unlock and relock siding panels. You will also need high-quality tin snips or a circular saw with a fine-tooth blade installed backward for clean cuts. A power shear can also be used for faster, more precise longitudinal cuts on thicker panels.
Measurement and leveling tools are non-negotiable for a professional result. A laser level or a long spirit level ensures that every course of siding is perfectly horizontal. Chalk lines are used to establish the baseline for the starter strip. Without these, the entire project will eventually appear skewed, as even a minor error at the bottom is magnified as you move up the wall.
Safety should never be compromised during an exterior renovation. Sturdy scaffolding or high-quality ladders with stabilizers are necessary for reaching upper stories. Eye protection is mandatory when cutting vinyl, as small shards can fly off at high velocities. Additionally, wearing gloves protects your hands from the sharp edges of the panels and the old nails being removed during the teardown phase.
Step-by-Step Removal of Old Cladding
The first physical step in the vinyl siding replacement guide process is the careful removal of the existing exterior. It is tempting to move quickly, but rushing can damage the underlying sheathing or the home’s windows. Start at the top of the wall and work your way down, using a pry bar to gently remove nails. This “top-down” approach helps prevent heavy debris from falling on the material you have yet to remove.
Once the old siding is gone, you must inspect the house wrap or building paper. If the home was built several decades ago, it might only have a layer of felt paper, which may be brittle or torn. This is the ideal time to upgrade to a modern, perforated house wrap that allows interior moisture to escape while blocking liquid water from entering. Check all corners and joints for signs of old water intrusion and replace any rotted wood immediately.
Proper disposal of the old material is also a logistical consideration. Many municipalities have specific rules regarding the disposal of PVC and old painted wood. Renting a roll-off dumpster is usually the most efficient way to manage the waste. Ensure the work site remains clean throughout the process to prevent nails and debris from hiding in the lawn, which can be a hazard for mowers and pets.
The Importance of the Substrate and House Wrap
The performance of your new siding is only as good as the surface it is attached to. The substrate, usually Oriented Strand Board (OSB) or plywood, must be flat and secure. Any protruding nails or uneven seams in the sheathing will “telegraph” through the vinyl, creating visible lumps in the finished wall. If the sheathing is soft or shows signs of delamination, it must be replaced before proceeding.
Modern house wraps are engineered to act as a “weather-resistive barrier” (WRB). This layer is critical because vinyl siding is not waterproof; it is designed to shed the majority of water, but some will inevitably get behind it. The WRB ensures that this moisture drains away safely rather than soaking into the wood. Taping the seams of the house wrap with specialized construction tape is a vital step for air sealing and moisture protection.
In addition to the wrap, consider installing a rainscreen system in high-moisture areas. This involves creating a small air gap between the house wrap and the siding using furring strips. This gap allows for rapid drainage and ventilation, ensuring that the wall assembly stays dry. While not always required by code, it is a “best practice” that significantly extends the life of the home’s structure.
Mastering Flashing and Trim Installation
Water management is the most important aspect of any vinyl siding replacement guide. Flashing is the unsung hero of this process, directing water away from vulnerable junctions. “Z-flashing” should be installed over all windows and doors to prevent water from seeping behind the frames. Similarly, kick-out flashing is required where a roofline meets a vertical wall, preventing water from pouring into the wall cavity.
Corner posts and J-channels are the trim pieces that hide the cut ends of the siding panels. These should be installed before the main panels. J-channels are used around windows, doors, and at the top of the wall under the soffit. It is crucial to leave a small gap (usually 1/4 inch) inside these channels to allow for the thermal expansion of the siding panels. In colder weather, this gap should be increased slightly.
Undersill trim, also known as utility trim, is used under window sills and at the very top of the wall. This trim holds the top edge of a panel that has been cut horizontally to fit the space. Using a snap-lock punch, you can create “ears” on the cut edge of the vinyl that lock into the undersill trim. This ensures the top course stays secure even in high winds and creates a clean, finished appearance.
The Critical Role of the Starter Strip
The starter strip is the foundation of the entire siding system. If this first piece is not perfectly level, every subsequent row will be increasingly crooked. To install it, find the lowest corner of the house and measure up the width of the siding minus an inch. Strike a chalk line around the entire perimeter of the building at this height. This ensures that the siding will meet up perfectly when you round the final corner.
Fasten the starter strip along this chalk line, leaving a 1/4 inch gap between sections to allow for expansion. The strip should be positioned low enough to cover the edge of the foundation but high enough to clear the ground. A common mistake is installing the siding too close to the soil, which can lead to moisture wicking and pest issues. Maintaining at least 6 inches of clearance from the ground is a standard recommendation.
In some cases, you may need to use a wider starter strip or a combination of flashing and trim if the foundation is significantly out of level. The goal is to create a straight, level base that supports the weight of the panels above. Once the starter strip is in place, the first course of siding can be “snapped” into it, providing the necessary tension to hold the wall together.
Nailing Techniques: Avoiding the “Tight” Mistake
Perhaps the most counterintuitive part of installing vinyl siding is how it is nailed. Unlike wood, which is nailed tightly to the studs, vinyl must be allowed to “float.” Because PVC expands and contracts significantly with temperature changes, the panels need to slide back and forth. If you nail the siding too tightly, it will buckle and wave as soon as the sun hits it.
Always drive nails into the center of the pre-punched slots, not at either end. Leave about 1/32 of an inch—roughly the thickness of a dime—between the nail head and the siding. This allows the panel to move freely. Furthermore, use corrosion-resistant nails, such as galvanized steel or aluminum, with a head diameter of at least 5/16 inch. The nails should penetrate at least 3/4 inch into the solid wood framing or furring strips.
Spacing between nails is also important for wind resistance. For most applications, nails should be placed every 16 inches. In areas prone to high winds or hurricanes, this spacing should be reduced to 8 or 12 inches. Never nail through the face of the siding; always use the hidden nailing hem at the top of the panel. Following these fastening rules is the difference between a professional-looking job and one that fails within the first year.
Proper Panel Overlapping and Seaming
To create a continuous look, siding panels must be overlapped where they meet horizontally. The standard overlap is 1 inch. When overlapping, it is important to consider the primary line of sight. For example, if you are looking at the house from the front driveway, the overlaps should face away from that point so the seams are less visible. This is often referred to as “shingling” the seams.
Avoid stacking seams directly on top of each other in consecutive rows. This creates a vertical line that is visually distracting and can lead to water infiltration. Instead, stagger the seams by at least 3 feet. This layout provides better structural integrity and a more natural appearance. If you are using longer panels (some manufacturers offer 16-foot or 25-foot lengths), you can significantly reduce the number of visible seams on the wall.
During installation, ensure that the panels are fully “locked” into the course below. You should feel a distinct snap when the hook on the bottom of the panel engages with the lock on the top of the previous row. However, do not pull the panels upward too forcefully before nailing, as this can distort the shape and lead to uneven courses. A “relaxed” lock is the goal for a flat, uniform wall surface.
Managing Transitions and Obstructions
Every home has obstacles like dryer vents, light fixtures, and hose bibs. These require careful integration to prevent leaks. Specialized mounting blocks are available for almost every type of fixture. These blocks provide a flat surface for the fixture to sit on while offering a built-in J-channel to receive the siding. This creates a much cleaner look than trying to cut and caulk around a round pipe.
When transitioning between different materials—such as moving from vinyl siding to a stone veneer water table—proper flashing is essential. A drip cap should be installed to direct water away from the top of the lower material. Similarly, where the siding meets the soffit at the top of the wall, leave enough room for the siding to expand vertically. The final course often needs to be trimmed to fit and locked into a utility trim piece.
Shutters and other decorative elements should be installed after the siding is complete. When mounting these items, be sure to drill oversized holes through the siding. This ensures that the screws or shutters do not pin the siding to the wall, which would again restrict the necessary thermal movement. Use high-quality exterior-grade fasteners to prevent rust streaks from forming on your new panels.
Maintenance and Cleaning for Longevity
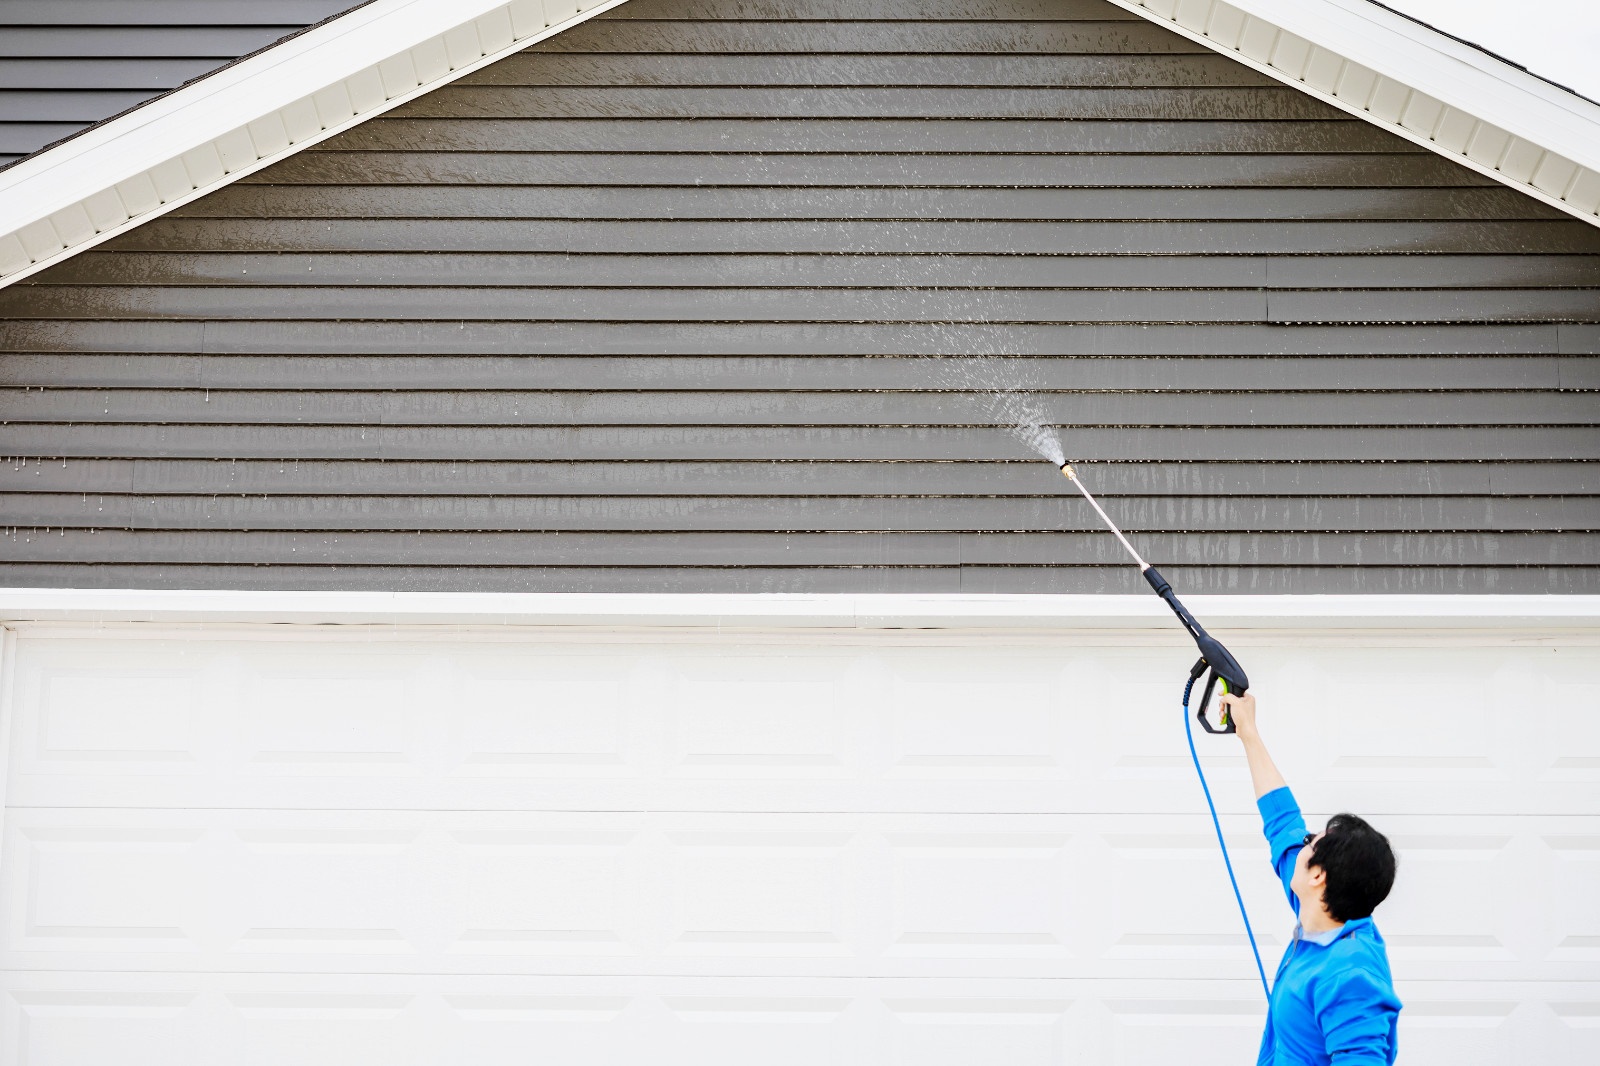
One of the primary selling points of vinyl is its low maintenance, but “low” does not mean “none.” At least once a year, you should inspect the siding for any loose panels or damage from gardening equipment. Cleaning the siding is also important to prevent the buildup of dirt and biological growth. A simple solution of water and mild dish soap is usually sufficient for most stains.
Avoid using a high-pressure power washer, as the intense force can drive water behind the panels and damage the house wrap or sheathing. Instead, use a soft-bristle brush and a garden hose. Start at the bottom and work your way up to prevent streaking, then give the entire wall a final rinse from the top down. For stubborn mold or mildew, a mixture of 70% water and 30% white vinegar is an eco-friendly and effective cleaner.
If a panel does become damaged—perhaps by a stray rock from a lawnmower—it can be replaced without tearing down the whole wall. This is where the zip tool mentioned earlier becomes invaluable. You can use it to unlock the panel above the damaged one, remove the nails from the broken piece, and slide in a new one. This ease of repair is a major advantage of vinyl over monolithic materials like stucco or brick.
Comparison of Exterior Cladding Materials
To provide a broader context in this vinyl siding replacement guide, it is helpful to see how vinyl stacks up against its competitors. While vinyl is the leader in affordability and ease of maintenance, other materials offer different benefits that might appeal to certain homeowners.
| Material Type | Average Lifespan | Maintenance Level | Relative Cost | Best Feature |
|---|---|---|---|---|
| Vinyl Siding | 25–40 Years | Very Low | $ | Value & Versatility |
| Fiber Cement | 30–50 Years | Moderate (Needs Paint) | $$ | Fire Resistance |
| Natural Wood | 20–100 Years | High (Stain/Paint) | $$$ | Authentic Aesthetic |
| Aluminum | 30–40 Years | Low | $$ | Recyclability |
| Brick Veneer | 100+ Years | Low | $$$$ | Extreme Durability |
As the table illustrates, vinyl offers a compelling balance of longevity and cost. While fiber cement (often known as James Hardie) provides superior fire resistance and a more “solid” feel, it requires periodic painting and more complex installation techniques. Wood provides unmatched natural beauty but is susceptible to rot, insects, and requires constant upkeep. For most residential applications, vinyl remains the pragmatic choice.
The Impact of Siding on Energy Efficiency
Modern exterior renovations are increasingly focused on the “building envelope” and thermal performance. Standard vinyl siding, while effective at shedding water, has a very low R-value (a measure of thermal resistance). However, when combined with high-quality house wrap and rigid foam sheathing, the entire wall system becomes much more efficient. This reduces the workload on your HVAC system and stabilizes indoor temperatures.
Insulated vinyl siding products can add an R-value of 2.0 to 5.0 to your walls. This may seem like a small number, but because it covers the wooden studs (which typically account for 25% of a wall’s surface area), it eliminates the paths where heat escapes. This is particularly beneficial in older homes that may have thin or settled insulation within the wall cavities. Furthermore, the tighter seal reduces drafts, making the home feel more comfortable during windy winter months.
Environmental considerations are also coming to the forefront. PVC is a recyclable material, and many manufacturers are now incorporating post-consumer content into their siding. Additionally, because vinyl does not require painting or staining, it eliminates the Volatile Organic Compounds (VOCs) that are released during the maintenance of wood or fiber cement. Choosing a high-durability vinyl also means the material will stay on the house longer, reducing the frequency of replacement and landfill waste.
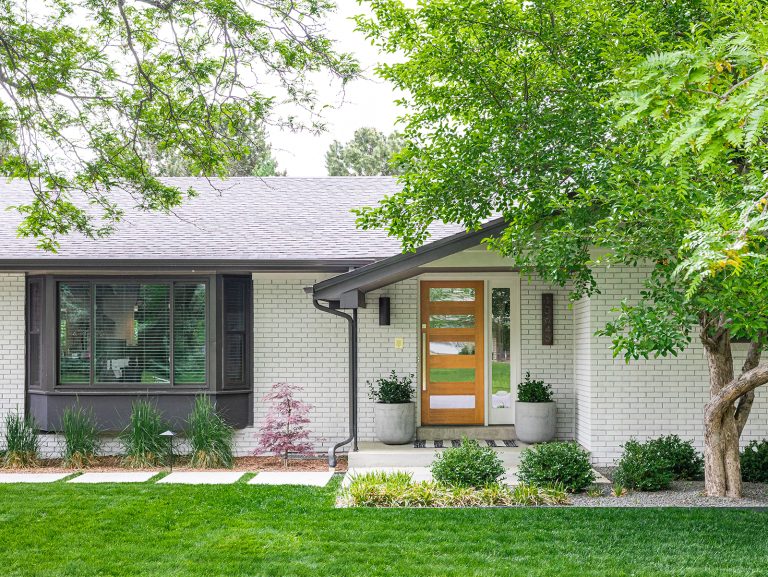
Aesthetic Trends and Curb Appeal
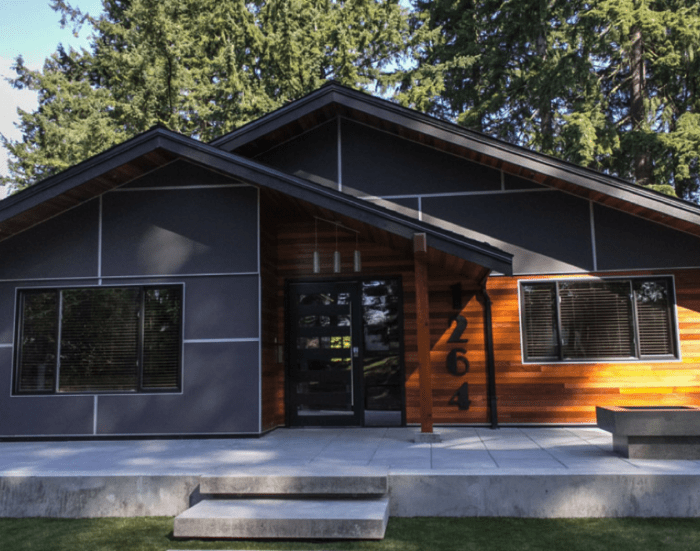
The days of vinyl only being available in “beige” or “white” are long gone. Contemporary color palettes include deep charcoals, forest greens, and even bold navy blues. These darker hues are achieved through improved acrylic formulations that resist the “fading” caused by UV exposure. Mixing and matching styles is also a major trend; for example, using horizontal lap siding on the first floor and vertical “board and batten” or shake siding on the gables.
Texture has also seen massive improvements. High-end vinyl now features variegated colors that mimic the natural grain of cedar or the subtle variations in hand-split shakes. When viewed from the curb, it is increasingly difficult to distinguish premium vinyl from natural wood. Adding wider trim boards around windows and doors—often in a contrasting white or cream—can further enhance the architectural definition of the home.
Lighting plays a role in how your siding looks throughout the day. Deeper profiles like Dutch lap create stronger shadows, giving the house a more dimensional and expensive appearance. When selecting your siding, it is helpful to take large samples outside and view them against your home’s foundation and roof at different times of the day. This ensures the color remains appealing under various lighting conditions, from the bright midday sun to the golden hour of sunset.
The Value of Professional Installation
While this vinyl siding replacement guide provides the knowledge needed to understand the process, executing it requires a high level of skill. Hiring a certified professional offers several advantages, most notably the warranty. Many manufacturers will only honor their lifetime warranties if the product is installed by a licensed contractor who follows the specific installation manual to the letter.
Professional crews also have the equipment to handle high-reach areas safely and efficiently. They can often complete a whole-house replacement in a matter of days, whereas a DIY project might stretch into weeks or months, leaving your home’s substrate exposed to the weather. Furthermore, experienced contractors have an eye for detail, ensuring that all trim pieces are perfectly mitered and that the “floating” nail technique is applied consistently across the entire project.
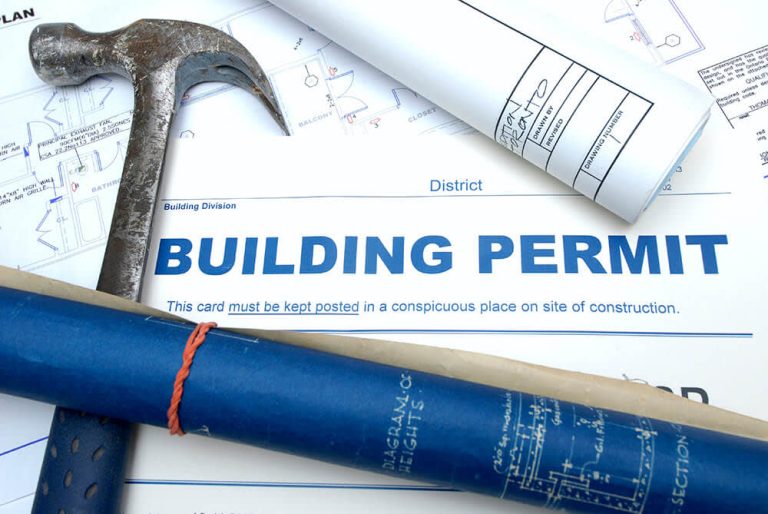
When vetting a contractor, ask for references and proof of insurance. A reputable installer should be familiar with local building codes and be able to handle the permitting process for you. They should also provide a clear, written contract that outlines the scope of work, the specific materials to be used, and a timeline for completion. This professionalism protects your investment and ensures the final result meets your expectations.
Common Pitfalls to Avoid
One of the most frequent mistakes in siding replacement is failing to address underlying structural issues. Covering up rotted wood with new siding is like putting a bandage on a deep wound; the problem will continue to grow unseen. Always ensure the “bones” of the house are healthy before the first panel goes up. Another pitfall is improper flashing at the roofline, which is the leading cause of “unexplained” leaks in newly sided homes.
Over-nailing is another common error. As previously emphasized, the siding must be able to move. If you hear “cracking” or “popping” sounds from your walls on a sunny day, it is a sign that the panels are nailed too tight and are struggling to expand. This stress can eventually lead to the panels unzipping or warping permanently. Finally, ensure that the J-channels are not clogged with debris or caulk, as they need to function as drainage paths for moisture.
Ignoring the “details” like the soffit and fascia is another missed opportunity. Replacing your siding while leaving old, peeling wooden soffits creates a disjointed look. Most siding manufacturers offer matching or complementary aluminum or vinyl soffit systems. These systems are vented to provide necessary airflow to your attic, which helps prevent ice dams in the winter and reduces cooling costs in the summer. Treating the exterior as a holistic system rather than a collection of separate parts leads to the best outcome.
Conclusion: The Long-Term Benefits of Quality Siding
Investing in a full siding replacement is one of the most significant upgrades you can make to your property. It provides an immediate boost to curb appeal and, more importantly, shields the structural integrity of your home from the destructive power of water and wind. By utilizing the insights provided in this vinyl siding replacement guide, you can ensure that your project is handled with precision and care.
Whether you choose to tackle the project yourself or hire a team of professionals, the key is attention to detail. From the leveling of the starter strip to the “floating” of the nails, every step contributes to the longevity of the installation. In an era where home values are at record highs, maintaining the exterior of your residence is not just about aesthetics—it is a critical strategy for wealth preservation and peace of mind.
As materials continue to advance, the gap between “synthetic” and “natural” continues to close. Modern vinyl offers the beauty of wood, the durability of masonry, and the ease of plastic. It is a versatile, high-performance solution that stands the test of time. By following best practices and choosing quality materials, you can rest easy knowing your home is well-protected for many years to come.